Places to Go

Sunday, October 30, 2011

Breakfast


     Breakfast is a very important meal. I've already talked about how much I love brunch. I mean I loooove brunch. But what is brunch but breakfast foods? And breakfast foods are what you need to start the day out right. To be energized and full of life. To be able to face the world.


     So, what I'm saying is: sometimes you should treat yourself to breakfast. Move past the cereal...because some days cheerios just won't do. Mix it up a little bit and especially if you have people to share it with (have a breakfast brunch happy food party!) make Breakfast Pizza.


     Breakfast pizza is something I've been fascinated with. Its something I bookmarked when Deb made it on SmittenKitchen. And then again when Joy the Baker made it. But then I finally did it. I invited a friend over to brunch and made this lovely pizza (using that ridiculous Trader Joe's Pizza Dough...I swear I'll make my own crust some day but it only costs a dolllllarrr and I can't resist...). I cracked eggs directly onto a pizza! It was empowering.


     More importantly, it tasted so good - the whole thing, eggs included. Breakfast can taste delicious. And filling. And healthy and vegetable-y. But also goldenly cheesey. Breakfast can wake you up and make you go out and grab the day. So someday, maybe not today because I know you're busy, but someday - you should think about making Breakfast Pizza. Then you can go conquer the world.


Breakfast Pizza
Loosely Adapted from Smitten Kitchen

Note: The simplicity of this recipe is alarming, you just throw a bunch of stuff onto rolled out pizza dough. This is why you can make it any time!

1 Trader Joe's Pizza Dough Ball or enough pizza dough for a 12'' diameter pizza
Olive Oil
1/2 cup White Button Mushrooms, sliced 
1 cup Baby Spinach
2 tsp Oregano
1/2 tsp Salt
1 tsp Pepper
1/2 cup Chedder Cheese, shredded
3 Eggs

Pre-heat your oven to 425 degrees and grease your baking sheet (if you are using a baking sheet and not a pizza stone) with a little olive oil. Roll your ball of dough into a 12'' diameter circle or into a rectangle the size of your baking sheet (alternately: stretch it out, place it on your baking sheet and continue pushing at it until it fills the entire baking sheet - try not to tear). Drizzle the dough with olive oil and rub it in. Lay the spinach leaves down, then the mushroom, then sprinkle the oregano, salt, and pepper over everything. Top with the cheese, spreading it evenly over everything and creating a flat surface for the eggs. Crack the three eggs on three different parts of the pizza (making them a little more far apart than I did would probably be helpful) trying to keep the yolks intact. Bake for 10-12 minutes, until the crust is golden and the eggs are just cooked (I overcooked my eggs a little as you can tell by the yolks, but really it tasted great anyway). Take out, allow to cool for 5 minutes, transfer to a cutting board, and eat!

Wednesday, October 26, 2011

Fall Sweetness


     I love fall and pumpkins. I love how they are both orange. Orange is such a warm color, such a crisp and crunchy leaf color but also a soft sweet potato color...or a soft woolen sweater color. I kind of want an orange sweater. A big comfy one. Anyhows....Orange is pumpkins and pumpkins are fall, so of course I had to make something pumpkin-y.


     But not just anything in general pumpkin-y. Pumpkin Chocolate Chip Cookies specifically. Because they were blogged about on Slow Like Honey. Because they looked so delicious and cake-like, and I do love soft cookies. In fact, I think almost all the cookies I make are the soft and chewy kind.....the kind that are almost falling apart when they come out of the oven and melt in your mouth when you gobble them up off the cookie sheet and burn your tongue. The kind that stay all springy and tender after they cool down so that you constantly crave one...Yes. That kind of cookie.


     And so, in the barely two days while she was visiting me, I planned to make these cookies with KK. But....then we ran out of time. It was a tragedy. I didn't think I would be able to find any time to make these cookies. I was sad. Still, you know this story ends well because there are cookies. Why are there cookies? Because, I was saved by a source who is as yet a mystery to you.


     That sentence was convoluted. But it sounded kind of like an old detective show. Or the parodies of old detective shows that they do on Whose Line....do you know what I'm talking about? If not, you should watch more Whose Line.


     Aaaanyhow, I was saved by my mentee! My little sister in a Big Brother Big Sister like program you know. Because fourth grade girls like to make cookies. And I like to make cookies too. So its a bonding thing. And we all got delicious cookies out of it. Delicious slightly spicy cinnamony pumpkiny full of chocolatey goodness cookies. The moral of the story is: even when you think you can't make cookies you should find time - or a friendly helper - who will make you make cookies. Because life before these cookies was missing out on pumpkiny goodness, and we all need that sometimes.


Pumpkin Chocolate Chip Cookies
Adapted from Slow Like Honey
Yields 20 Cookies

1 cup Canned Pumpkin
1 cup Granulated Sugar
1/2 cup Vegetable Oil
1 Egg 
2 cups All-Purpose Flour
2 tsp Baking Powder
2 tsp Ground Cinnamon
1/2 tsp Salt
1 tsp Milk
1 tsp Baking Soda
1/2 tbsp Vanilla Extract 
2 cups Semisweet Chocolate Chips

Pre-heat the oven to 350 degrees and layer parchment paper on two baking sheets (I had to use the two, then do another batch once one came out, so maybe take out a third cookie sheet if you feel so inclined?).

In a large bowl, stir together the canned pumpkin, sugar, vegetable oil, and egg. In a separate large bowl, whisk together the flour, baking powder, ground cinnamon, and salt. Dissolve the baking soda in the milk in a little bowl, and stir it into the dry ingredients. Add the dry ingredients to the pumpkin mixture, and stir with a wooden spoon until everything is combined (make sure you get all the flour that drops to the bottom of the bowl!). Stir in the vanilla and then the chocolate chips.

Use a tablespoon measure to spoon the batter out onto the baking sheets, it is a sticky, gooey batter so an extra spoon is also helpful. Make sure you leave about 1.5'' of space around the cookies because they will spread. 

Bake for 10-12 minutes at 350 degrees, until they are firm to touch and lightly browned. Let them cool on the baking sheet for ten minutes, then transfer them to a wire rack.

Try to stop yourself from eating them all at once! They will technically last 5 days in an airtight container. But good luck.

Sunday, October 23, 2011

Montreal!


     I thought I would give you some pictures of Montreal. Just to get you through a lazy Sunday...because it was beautiful while I was there and it seems a shame not to share. Up there I caught CV reading, he is in the center.


    All of these pictures are from Parc du Mont Royal, where every Sunday during nice weather Tam-tams happens. Tam-tams is a drum circle where anyone who wants to can bring a drum, join in, and play. Isn't that such a great idea? So many cool rhythms were going on!


     Meanwhile, there are also vendors selling things, people slacklining and live-action-role-playing (see the crusaders below), and just hanging out all over the park.


     There was also this really cool poster all about life and the different ways to look at and experience life. I wish I'd had time to read all of it, but it was so hard to focus on any one thing with all the interesting quotations and messages all over it.


     As you can tell, there were a lot of people the Sunday I went. Probably everyone was enjoying the last summery day Montreal may have in a long time.

        But it was still very peaceful and beautiful in the park even with all the people.


     I hope you still have nice weather wherever you are, whether it is still keeping its summer sun or finally edging into autumn.

     It is always nice to go out and enjoy the beautiful days while you can! I hope you are getting a chance to.


Love, SS

Friday, October 21, 2011

Canadian Thanksgiving

     Did I tell you that I traveled? That I went all the way to Canada? Well, not last weekend but the weekend before that's where I was! For my fall break. And it was lovely. I went up there to see my friend CV at McGill. Do you remember him? He is the one I sent a care package to last year, and I will end up doing it again this year because he just has so much work! Stressed out people need cakes and cookies. Tis a fact. Look at how intimidating the McGill physics building is...


     It was also Canadian Thanksgiving. Which was amazing because two sets of CV's friends held lovely potlucks that I got to attend, so I stuffed my face with roast chicken, mashed potatoes, pumpkin pie (pumpkin pie! with fresh whipped cream!), and the most amazing roast vegetables in the world prepared by CV and myself. If you repeatedly glaze parsnips, sweet potatoes, pumpkin, and carrots with a mixture of balsamic vinegar, honey, cinnamon, garlic, and a multitude of spices what but the best roasted vegetables in the world could you get after all? And I got to try poutine! Which I wish I had taken a picture of because it is a specialty of Montreal: french fries topped with cheese curds and gravy, and it is delicious.


     But, most importantly, to the first of those potlucks CV and I brought a Potato Gratin. And this was no ordinary gratin. This was the most scrumptiously deliciously cheesy creamy crispy bacony potato gratin ever to exist. I almost have no words to describe it. It almost achieved Epic Meal Time status. Do you watch Epic Meal Time? Picture a group of guys making curried bacon and or giant gingerbread houses made of meat and then eating these foods that can count up past 10,000 calories each....it is Epic.


     Well, thankfully our gratin wasn't 10,000 calories. But it was delicious. With a bechamel including tons of mozzarella cheese and pumpkin bits that were immersion-blended into it (this was when I got to use the immersion blender!!!! CV has one!!!), and the potato slices some crispy and some soft (because....we ran out of time and there was no time to bake them in the gratin, so we fried some of the potatoes in the pan and baked some of them on a baking tray and then layered everything in the gratin pan with the bechamel and bacon bits and baked it for a bit....Sigh. Still, with all the frantic-ness of multiple potato pans going at once, it did yield inspiring results), and then the Bacon Bits on top giving crunch and saltiness....you smell the epic-ness don't you? And then we ate it along with all this other food. And, as you can probably already tell, we were all very thankfully and contentedly full.


Thanksgiving Potato Gratin

8 medium Russet Potatoes, Peeled and thinly Sliced (a mandolin might help here if you have one)
2 tbsp Butter + A few pats of butter for the potatoes
2 tbsp Flour 
1 1/2 cup Milk (plus extra if necessary)
3/4 cup Shredded Mozzarella Cheese
1/2 Medium-Sized Pumpkin, Diced Finely
1 1/2 tsp Pepper
1 tsp Salt
1/2 tsp Garlic Powder
1 tsp Paprika
1/4 tsp Herbes de Provence*
1/4 cup Bacon Bits (or to taste, or leave out if vegetarian dish required)

Pre-heat the oven to 400 degrees. Butter an 8 in- baking dish and set aside.

In a large, heavy-bottomed saucepan at medium heat, melt the butter and stir in the flour. Continue stirring till the mixture is a golden brown. Then, slowly add in the milk, whisking continuously until it is fully incorporated. Do not add too much milk at once, because you do not want lumps. Keep over the heat, whisking and allowing it to come to a boil. Once it has come to a boil, lower the heat to a simmer and stir in the cheese until it is incorporated. Then, add the pumpkin pieces (which should be small) and use an immersion blender to create a smooth sauce. (If you do not have an immersion blender, you could probably transfer the sauce to a regular blender and blend the pumpkin in that way.) Stir the spices into the bechamel. If at this point, it is too thick - add a little more milk (about a tablespoon). If it is too thin, allow it to continue to cook over the low heat (or maybe raise the heat a little), or add a little more flour, or some more cheese (depending on how much you like cheese!).

Once your bechamel is to your liking, turn the heat off. In your baking dish, arrange your potatoes in concentric circles or as close to numerous flat layers as possible. Layer a few pats of butter on the top layer of potatoes. Then, carefully pour your bechamel sauce onto the potatoes: pour along the sides of the dish as well so you can see it seeping into the bottom, and wherever there are cracks so it goes into all the layers. Place in the oven to cook for 45 minutes, after which you can take it out, top with bacon bits, and put back into the oven for another 10 minutes, at which point it should be done. The gratin is cooked when all the potatoes are soft and cooked through, so you can stick a fork through at the 40, 50, even 60 minute mark because different people's ovens cook differently so the cooking time may vary. Serve warm!

* Note: We used these spices because we had them on hand. I could also see 1/4 tsp of Nutmeg tasting delicious, or a little Red Chili Powder for extra spice. Play with the spices, add the ones you like and the amount you want to taste.

Saturday, October 15, 2011

The Coming of Fall

     There is one reason I've been waiting for fall. For coldness and chilly toes and red noses (my nose gets very red when it's cold, all the time. It's a curse.) I have been waiting to be able to turn my oven onto 400 degrees for an hour and more without my apartment getting like a sauna. And I've been waiting to do this for one special reason: Roast Chicken.


     There is something about fall weather that calls out roast chicken to me. Maybe its the sudden thunderstorms of Philly that keep getting me soaked and cold, or the long dreary gray walks under sunless skies, but a perfectly golden roast chicken with crispy skin and moist insides just sounds better and better all the time. Which is why I made a roast chicken on Thursday night.


     But let me tell you, this was not any roast chicken. This was a celebration dinner with my friend KK who was visiting. It was also an opportunity to roast lovely slices of sweet potato underneath the chicken, so they could catch all the chicken drippings. Deliciousness. It was a roast chicken that was accompanied by the Disney movie Tangled because that is what grown up chicken-roasting college girls watch. And it was the most perfect roast chicken I have ever eaten.

     Partially, it's the recipe. I use Nigella Lawson's super simple roast chicken recipe: stick half a lemon inside the chicken, massage its breast with butter and salt and pepper, and place it in a 400 degree oven: that's it. But maybe it was me using an entire lemon instead of half, or brining the chicken for an hour before roasting it, or the accidental purchase of the best chicken at the store- but this roast chicken turned out to be the moistest chicken I (and KK) have ever eaten.


     I cannot even fathom telling you how good it was. You will just have to make it yourself, cut through that crispy skin into the succulent meat because both dark and white were equally delicious, and find out for yourself the perfection in the simplicity. Then find out again the next day when you make roast chicken sandwiches out of the leftovers and sit there chewing on the couch going: Ahhhh who knew leftover chicken could be so delicious.


Simple Roast Chicken
Adapted from Nigella Lawson's How to Eat

1 Whole Chicken for Roasting
Salt
Sugar 
Cloves (optional) 
1 small Lemon 
1 tbsp Butter
Pepper

This recipe starts with buying a whole chicken for roasting. Once you bring it home, if you are planning to cook it the same or the next day, take out its giblets and stick it straight into a large bowl filled with water, a tablespoon of salt, a tablespoon of sugar, and 2 cloves (optional). If the chicken is for the next day, cover it and place it in the fridge in its brining bowl. (Whenever you plan to cook the chicken, try to brine it overnight before because this means it stays extra moist.) If you are cooking the chicken the same day, try to let it sit in its brine for at least an hour, to get it all moistened up.

Once you are ready to cook, pre-heat your oven to 400 degrees. Take the chicken out of the water, allowing all the water inside it to drain out. Pat it dry thoroughly with paper towels because otherwise the skin won't get crisp. Next, stuff a small lemon inside the chicken (I tend to look at my chicken first and then go out and buy the largest lemon I think will fit inside it). Once that is done, take half of your tablespoon of butter and massage it into the chicken Under the skin of the breast into the meat itself. Take the rest of the butter and rub it around on the skin of the chicken. Then, sprinkle a little salt and pepper onto your hand, and massage that under the skin into the breast of the chicken. Get yourself a little more salt and pepper and rub it over the rest of the chicken. You don't need a lot, just a sprinkling.

Once the chicken is duly massaged, place it on a roasting rack on top of a roasting pan and into the oven. Nigella says it takes 15 minutes per pound plus ten minutes. I generally have my chicken in the oven for about an hour, and the best way of checking if its done is to stick a knife into it and see if the juices coming out are red (not done) or clear (done!).

Note: I never roast my chicken alone. In the roasting pan, I generally spread a generous amount of olive oil. I either cube up russet potatoes or slice sweet potatoes thinly and then turn them around in the olive oil so they get nice and coated. I try to spread them apart in a single layer, then I sprinkle them with salt, pepper, and some spices if I have anything (generally a little paprika and red chili powder on potatoes, and cinnamon and a little bit of honey over the sweet potatoes). If you have a large chicken, the vegetables will probably be done before the chicken, so take them out about 45-50 minutes into cooking time regardless of your chicken. Leftover roast veggies go great in roast chicken sandwiches!

Sunday, October 9, 2011

Zucchini Bread


     Everyone is making zucchini bread. Joy made zucchini bread. Kristin at the Kitchen Sink made zucchini bread. Scroll down the page on Seven Spoons and there's zucchini bread again. STOP TEMPTING ME PEOPLE! I want zucchini bread so bad so bad so bad. Furthermore, there's zucchinis in my fridge so its so close to possible.

    
     Who invented exams anyway? Why should an exam and a paper be standing in the way of my making zucchini bread? On the other hand, why can't cravings go away because I could sooo easily just make this zucchini bread after said exam and paper! But my craving just won't let me. I want this and I want this now. Isn't it so easy to crave food that way? You have cravings that just won't go away right?


     But, perseverance and a lack of time wins through in the end. I studied for my midterm and wrote my paper people, I did not make zucchini bread. BUT right after I got out of my midterm, I did. I sat there and shredded away at the zucchini with my peeler (I don't have a grater! Next kitchen implement to be acquired. Other than an immersion blender. Which by the way I actually go to use IN REAL LIFE this weekend...and it was awesome...). Anyway, in the two hours between my midterm and my next class, I shredded zucchini, mixed up a batter, and baked awesome zucchini bread AND did (most of) the dishes. Woo hoo.

    
     And then, after my class, I got to eat the zucchini bread! What could be better after a day of exams? Warm zucchini bread, because I had left it in the oven during class - actually, I left it there because it wasn't fully baked by the time I had to leave but I didn't want to leave the oven on while I was in class, so I figured if I just turned the oven off it would finish in there while the oven cooled down. Phewf long explanation. When I came back it was still a little smushy right in the middle of the loaf, I recommend using the whole baking time properly! But in the end, I got a zucchini bread all crunch and crackly at the edges, soft inside, cinnamony and spicy, with the little flecks of zucchini all throughout. Even those smushy bits were delectable, and after eating a whole end of the bread, I then toasted a slice from the middle and buttered it. Yum. It is that fall season again, and it makes me happy inside.

Zucchini Bread
Adapted from Joy the Baker

1 Large Zucchini, Shredded (should yield 2 cups Shredded Zucchini) 
3 cups Flour
1 1/2 tsp Baking Soda
1/2 tsp Baking Powder
1 tsp Salt
3 tsp Cinnamon
1/4 tsp Nutmeg
1/2 cup plus 1 tbsp Milk 
1 cup Vegetable Oil 
2 tsp Vanilla Extract
1 1/3 cup Granulated sugar

Pre-heat the oven to 350 degrees and grease and flour an 8x4 or 9x5 loaf pan. Also, shred your zucchini! I used a peeler and then chopped up the rather large zucchini pieces I had, a grater would probably work better.

In a large bowl, whisk the flour, baking soda, baking power, salt, cinnamon, and nutmeg together. In a separate medium bowl, whisk the milk, vegetable oil, vanilla extract, and sugar together. Once the wet ingredients are thoroughly combined, fold in the shredded zucchini. Then, pour the wet ingredients into the dry ingredients and fold them in with a spatula. Make sure to keep lifting the flour up from the bottom of the bowl so all of it gets combined. Once it is well mixed, scrape the batter into the loaf pan and put it in a center rack in the oven. Bake it for 60-65 minutes or until a toothpick inserted in the center comes out clean. Take it out, and allow it to cool in the pan for 20 minutes before turning it out onto a wire rack. Cut slices and serve warm! Or wait for it to cool completely.

Sunday, October 2, 2011

Brunching the French Way


     I love brunch. I love breakfast foods. Waffles, pancakes, eggs benedict (so good!), you name it - I constantly crave it. How can people not like eggs? Or any of those other oh-so-comforting first-thing-in-the-morning delights? So, for all you breakfast foody people like me - this post is for you! Because, I had brunch with a friend today at my house.


     And not only did I have brunch, I got to revisit my summer memories. Well, literally because I showed my friend all my fancy Euro-trip pictures (whoo fantastic summer vacations!) but figuratively through food. Because, every since I have left France, I have been craving crepes. In Paris, I think three mornings in a row (basically the entire time we were there) I got a nutella crepe for breakfast from the little stand in front of the metro stop we always used. I kept telling myself I would get a different kind....but what is a better breakfast than a nutella crepe? (Rhetorical Question.)


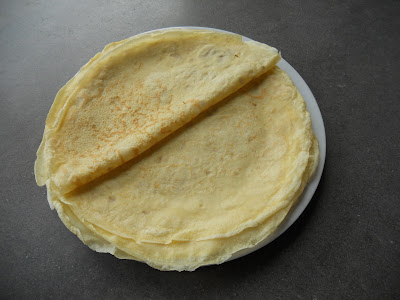
     So, this morning, instead of starting to study for my orgo or autonomic physiology (which is really annoying to type) midterms OR writing either of my English papers...I made crepe batter. And then I made ten of the most gorgeous crepes I have ever made. Well, the first two weren't beauties, but the rest were. And do you know why? Because I bought myself new frying pans for this year! Beautiful frying pans and one of them is actually BIG and perfect for crepe making!!!! Cooking implements make me happy. You should already know this.


     Anyhow, so I made crepes. And I cut up some white button mushrooms, half a tomato, and a bunch of baby spinach to make a savory filling. And I put Nutella, and strawberry jam, and peanut butter, and honey out on the table - because you never know what mood will strike. (Also: strawberry jam and nutella are delicious together. If you haven't tried it, you are missing out.) And then we scrambled eggs into our veggie filling, filled the hot crepes with it, and ate. Yum. You need energy to study. Energy from veggies and energy from Nutella. It takes all sorts to run the world.


Crepes
From Julia's Kitchen Wisdom by Julia Child (which everyone should own)
Makes 10 8-in crepes or 20 5-in

1 cup All-Purpose Flour
2/3 cup Cold Milk
2/3 cup Cold Water
3 large Eggs
1/4 tsp Salt
3 tbsp Butter, Melted plus more for the pan 

First, place the flour in a large bowl and whisk it, you want it to have as few lumps as possible throughout this process because there should be no lumps in crepes! Slowly whisk in the rest of the ingredients, trying to prevent lumping. You can also use a blender or food processor instead of whisking in a bowl. Once your batter is ready, refrigerate it for half an hour or more. Julia says: "A rest allows the flour particles to absorb the liquid, making for a tender crepe"

Once you are ready to cook, heat a nonstick frying pan (either 5'' or 8'' diameter) "until drops of water dance on it" at medium-high heat. Then, brush with a little melted butter. I have found that the best method for cooking crepes for me, is to hold the pan up off the heat, use a ladle to pour in the batter (you want about 3 tbsp of batter; enough to cover the bottom of your pan), and turn the pan quickly in a circular motion to get the batter to cover the entire pan. Then, place it back on the heat. Cook it for a minute or two, until the bottom is browned, use a wooden spatula to unstick the edges from the pan, and flip! My way of flipping: jerk the pan towards and away from you a few times so that the crepe is moving freely, then do a bigger jerk away from you and flip the crepe. (It makes more sense while you're doing it.) Cook it only briefly, about 30 secs, on the other side, then slide onto a plate or wire rack to cool. Once they are cool, you can eat them, refrigerate them for 2 days, or freeze them for several weeks.