Places to Go

Friday, February 17, 2012

Returning to My Roots


     Sometimes, you have to work with what you have. That sometimes is pretty much all the time regarding cooking and me lately. I need to start shopping based on things I want to make. Instead I shop like this: I need a fruit (bananas), I need a cheese (this takes the longest), I need 2 vegetables (mushrooms!...and something random), I need 2 frozen foods because I know I will not cook once I get home from Trader Joe's after starving all day today, bread, sandwich meat...and there we have the constants of my ten things I buy every week (I leave room for a little miscellaneous..eggs? pasta? what don't I have at home? Toothpaste. You know, that kind of thing).


     The issue with this grand new shopping system is that while I have the ingredients needed to throw together my everyday meals (there's been a lot of omelettes lately), I never seem to have the right things for a Recipe. But then I had a revelation. Isn't that what I used to blog about when I blogged everyday oh so long ago? I just used to write about my everyday meals because isn't that The Point. That everyday meals can be made in college, that they can be super simple and not require a Recipe? No more capitals in the middle of sentences from now on, promise.


     Here's another revelation. I totally missed my one year anniversary of blogging. I feel like I don't deserve it anyway due to my winter break hiatus... But this is my 100th post. Wow. You know, I constantly contemplated my 100th post, and how I would make something super fancy and super special. But in a way, this is much more fitting. Here am I, college student with fridge full of my 10 weekly items, telling you that a little thinking out of the box and scrounging around your apartment is all you really need to make a special meal just for any old weeknight.


     So, here's what I actually made: mushrooms (obviously) and pasta. Simple. But no jars of tomato sauce because just because we are in college doesn't mean we can't make sauce! It doesn't take that long, I promise. Here's what it took me: I chopped up mushrooms, I cooked the mushrooms, I took them out and used the same pan to cook down some red wine, chicken broth, and spices. I added my pre-cooked pasta (which I cooked to just al-dente) and my mushrooms, and simmered everything together. Grand total: 20 mins. Use what you have on hand! Google recipes and find new ideas! But keep cooking, and your everyday meals won't seem everyday anymore, they will be 100th post worthy.


Red Wine and Mushroom Pasta

Note: Feel free to use any seasonings you like. Thyme, oregano all go well with basil, or as substitutes. Red chili flakes are of course optional, but they don't add a lot of heat to this just a little flavor. Also, I used the honey because my wine was Super acidic and I really didn't like its taste that much, so honey is a good...rounder-outer of the flavor. Use your taste buds to guide you! Also, use spaghetti or any other long/strand pasta you like, I just do think the long-strand types would work better than other kinds.

1 tsp Crushed Garlic (or 1 Garlic Clove, minced) 
2 tbsp Olive Oil 
10 oz Baby Bella Cremini Mushrooms (or really, any kind of mushrooms you like)
1/2 tsp Salt
1 tsp Dried Basil
1 tsp Italian Seasonings
1/2 tsp Red Chili Flakes
1/2 cup Red Wine
1/2 cup Chicken OR Vegetable Broth (Or 1/2 cup Water and 1/2 bouillon cube) 
1/2 tsp Honey
2 servings Linguine, Just-Cooked (i.e. take them out when they are still rather al-dente)

     Roughly chop your mushrooms, including the stems. In a very large frying pan, heat 1 1/2 tbsp of olive oil at medium high heat. Once it is hot, and 1/2 tsp of the crushed garlic, and allow it to sizzle for a minute. Then, add in the mushrooms and salt. Stir them around well, and then let them sit evenly on the pan and cook for 3-4 minutes, only stirring occasionally. Once they are darker and tender, and releasing some juices, transfer the mushrooms into a separate bowl. Try to the get the juices to stay in the pan.

     Add the remaining 1/2 tbsp of olive oil, and the remaining 1/2 tsp of the garlic to the same pan at medium-high heat. Allow them to sizzle for a minute, then stir in the basil, Italian seasoning, and red chili flakes if using. Stir in the pan for a minute or two, then add the wine and broth (or water and cube). Mix everything together well, adding the honey if needed, and then leave for 5 minutes. Allow the alcohol to evaporate off and the sauce to become thicker. Once it looks slightly (not A lot, just slightly) more viscous, add in the just-cooked pasta. Stir the pasta into the sauce, it will absorb the color and should start absorbing the flavors. Leave at a simmer for a few minutes, until the sauce has reduced further and most of it seems absorbed into the pasta, and then add the mushrooms. Simmer everything together for a few minutes until the mushrooms are hot again, and serve!

Sunday, February 5, 2012

Happy House


     It's been awhile.... A long while. There's the usual run of excuses to give - I had winter break! Then I came back! School started! And the more realistic - I was so exhausted when I got home I barely cooked. I was so overwhelmed when I got back to school that blogging seemed like a chore. Thankfully, I have put that all behind me - courtesy dropping a class and realizing No, there are not 30 hours in a day.


     Everything is settling down. Philly is looking beautiful again, and my stove ridiculously inviting. But not as inviting as my oven. I know that the last thing I posted - oh so long ago - was a cake, but I couldn't resist. I want to celebrate being back. This is my little internet home, and I wanted a little homey cake to go with what I can't help but consider my (hopefully permanent) return.


     I actually had no idea what kind of cake to make once I started thinking about blogging again, but there I was helped out by my little sister in the Big Brother Big Sister type program that I'm in. This week when I saw her, she really wanted to make a vanilla cake. And when we went grocery shopping, it was entirely her idea to buy a bag of Hershey's Mini Kisses. Inspiration comes from all sorts of places, and it was a good thing she was around because this cake would not have been half as amazing without her.


    So, we worked busily and produced this giant of a cake. Can't you just tell that it made the apartment smell heavenly? Golden crumbed on the outside, almost like cornbread as my assistant said, and densely vanilla-y inside with little chocolate chunks, it might have been lovely on its own. But we didn't stop there. I made a thick chocolate cream cheese filling and chopped almonds into it. Cutting the cake in half (Not very expertly...) and filling it was fun, eating it was so much more.


     I took it to a potluck at my friend's place, a house aptly named Happy House, and there it was happily devoured. That was really all I needed to blog again. I love cooking and I missed it....but more than that sharing my food and hearing how much people liked it reminded me that what I love most about blogging is sharing with all of you, and the thought that maybe someday you can share these foods with others. I hope you make this cake and it makes you as happy as it made me! It's good to be back.


Happy House Cake

For the Chocolate Chip Cake:
Adapted from Smitten Kitchen

4 cups All-Purpose Flour
2 tsp Baking Powder
1 1/2 tsp Baking Soda
1 tsp Salt
1 cup Softened Butter (I use Smart Balance...just to make myself feel better)
1 3/4 cup Sugar
2 tsp Vanilla
4 large Eggs
2 cups Milk
4 oz Mini Hershey's Kisses (or chocolate of your choice) 

Pre-heat the oven to 350 degrees. Butter a 9 by 13 pan and line the bottom with parchment paper (or you can use two 9 in cake pans if you want to make a layered cake), make sure to butter on top of the parchment as well. 

In a medium bowl, whisk together the flour, baking powder, baking soda, and salt. In a separate large bowl, use an electric mixer to beat together the butter and sugar until it is fluffy and a lighter cream color. Next, beat in the vanilla, and the eggs one at a time. Make sure everything is well mixed. Then slowly pour in the milk while beating at low speed. Your mixture is going to look supremely curdled. Once the milk is combined, add the flour mixture in three batches. Use the mixer on low to mix in each addition until it is just incorporated, no need to overmix. Pour your batter into your cake pan and spread it evenly. Lift your pan up an inch off the table and drop it down to pop any air bubbles. Then, place it in the oven for 45-50 minutes until its golden brown. While it is baking, start on the frosting.

Start checking the cake at 40 minutes but it might take slightly longer to bake. It is ready when you can insert a toothpick in it and it comes out clean. Place it on a wire rack once done, and let it cool in the pan for 10 minutes. Once it has cooled, run a plastic knife around the edges and upturn it onto the rack (if you have one that large). I just let mine finish cooling on a large cutting board.

For the Filling:

6 oz Mini Hershey's Kisses
1 tbsp Butter
1/4 cup Milk
5 tbsp Cream Cheese
1/3 cup Almonds, Finely chopped

Place the chocolate and butter in a small saucepan at medium heat. Mixing with a wooden spoon, let all the chocolate melt. Once it is melted, whisk in a couple of tablespoons of the milk. Next, whisk in the cream cheese (Note: if you would like, you can pre-whisk the cream cheese in another bowl or with an electric mixer so it is fluffy and you don't have to work so hard whisking it in by hand into the chocolate). Once the cream cheese is thoroughly incorporated, it is up to you. I wanted a fairly thick filling, but one that would easily spread through the cake and have vaguely the consistency of a pudding. So I whisked in slightly less than 1/4 cup of milk, and kept whisking and cooking it until it reached that. If you like a slightly thinner, more ganache like filling just add more milk. Once your filling is ready, whisk in the almonds.

To put the Cake together

Once the cake has cooled completely, place it on a cutting board and make sure you have another large cutting board or plate nearby. Use a long serrated knife to divide the cake into two layers. For me, this is easiest to do just going around all four edges, making sure the knife goes in as far as possible so you cut the middle in half as well. Carefully lift off the top and place it on your other cutting board or plate. Using a large spoon or spatula, dollop your filling out onto the cake. Use your utensil to evenly coat the entire cake. Once that is done and all your filling is used up, place the top of your cake back into place. Now cut a slice and eat!

Sunday, December 18, 2011

Finals

     It is Final Time. Perhaps you have guessed from the fact that I haven't been around. Or maybe you live in a college town or are in college and can feel the stress waves emanating through the air around you. Finals Finals Finals they say....Shut up Shut up Go Away, you reply. Or at least, that's how I would reply. If I could talk.


     One of those charming quirks of my personality is that I always get sick for exams. I'm sure my mom, for one, would throw me a party if I got through a single finals/midterm season without running a fever and hacking up my lungs the entire time. No party this time. And somehow, with my own special skills, I managed to contract an illness that has forced me to eat solely....Ensure. Which is not a food. It is a nutrition drink. And that along with mashed potatoes and mashed sweet potatoes and mashed bananas....is not a fulfilling finals diet. Can you blame me for being missing? You didn't want to hear about various ways to make mashed bananas interesting, did you?


      But, today I feel a little better. Or at least, I am better enough to want something that is Not Mush...that is in fact...baked....perhaps...banana bread? Of course, the issue with things like baking during finals time is that I am very strapped for ingredients. Who needs grocery shopping when there are things like organic chemistry exams to study for! So, no milk, no eggs, three vaguely ripe bananas....It's a good thing banana bread is pretty impossible to mess up, or this poor thing would never have made it into the oven.


     Because you see, the lack of milk or any other liquid meant that originally my batter was....lumps. Not a batter at all, simply sad lumps of flour trying to mix in with oil and sugar and all that jazz. But would you give up when trying to make your first solid food in a week? Of course not! And neither did I. I didn't have milk. I couldn't use water. Orange juice? No... And then it came to me.....tis the season for: HOT CHOCOLATE! Ya, Capitals. I was that excited. So, I made a cup of hot chocolate and into the batter it went. The result? Must you ask? Not too sweet, super moist, chocolatey, banana-y, with a touch of cinnamon I-have-already-eaten-too-much deliciousness...you are on your way to make this now right?


Hot Chocolate Banana Bread

1 1/2 cups All-purpose Flour
1/2 cup Unsweetened Cocoa Powder
1 tsp Baking Soda
1 tsp Salt
1 tsp Cinnamon
1/8 tsp Nutmeg 
1/3 cup Vegetable Oil 
1 cup Light Brown Sugar (or regular sugar, it will just be a tad sweeter)
2 tsp Vanilla 
3 Medium Sized Ripe Bananas, Mashed 
1 cup Hot Chocolate (i.e. 2 tbsp Hot Chocolate Mix stirred into 8 oz hot water)

Pre-heat your oven to 325 degrees and butter a loaf pan.

In one medium large bowl, whisk together your flour, cocoa, baking soda, salt, cinnamon, and nutmeg. In another larger bowl, stir together your vegetable oil, sugar, and vanilla. Mix your dry ingredients into your wet, and stir in the mashed bananas. Last of all, add your hot chocolate (make sure its stirred well! No lumps at the bottom) and mix it in thoroughly - so you have a nice smooth batter. Pour into your loaf pan, and bake for 55 to 60 minutes, until a toothpick (or plastic knife) comes out clean when you stick it in the middle. Let cool on a wire rack in the loaf pan for 10 minutes, then run a toothpick (or plastic knife) around the edges, upturn onto a plate, and enjoy! Or you know, wait for it to cool completely...then enjoy.

Study space...that is why the sticky notes are around, by the way.

Friday, December 9, 2011

An Ode to Roquefort

   
     The smell of Roquefort, that notorious salty blue fungi speckled French cheese, baking in the oven is heady. I feel almost drunk as I sit and write this, all off that smell. Man oh Man. So rich and salty and tempting me with things to come. That is only one of the good smells that came out of the oven today.


     The first, only half an hour ago, was of roasting acorn squash. That was slathered in balsamic vinegar and honey and olive oil and pepper and laid on a foil lined pan, placed in the oven, and yum. But you see, I couldn't eat it all off the pan - I stopped myself after only two pieces. Because today I made a flatbread.


     What is the difference between a pizza and a flatbread? I don't know why I feel the need to call this a flatbread, but can we let it slide? Because pizza or flatbread, this is just pure deliciousness. It came out of the oven by the way. I ate almost half of it standing over it telling myself I still need to save some to photograph tomorrow in the morning light. Do we all understand how this flatbread is a conglomeration of many good things together?

   
     Roasted acorn squash. Check. Spinach that was mixed up with lots of Roquefort and a little honey. Check. Then globs of Roquefort on Top. Oh My God. The sweetness of the squash against the saltiness of the Roquefort is more than divine. The spinach became almost creamy in its Roquefort bath and biting through the cheese and tender squash and spinach to the crunchy crust....Heaven.

    
     The irony behind all this is that before this summer you couldn't have paid me to touch blue cheese. Yet, post the most awesome trip to France with the loveliest people who I miss so so so much, I am a blue cheese person. But most specifically, a Roquefort person. The Roquefort eating (orgies) we had this summer were definitely inappropriate in the amounts of Roquefort sometimes consumed per day.


     Be warned that this recipe is an ode to those moments, and the taste of the cheese really comes through here. If you are not a blue cheese person, I would cut down on the amount you mix with the spinach, and just sprinkle less on top. But this recipe, the way I made it, is dedicated to my France trip companions....you would like it.

Roquefort, Spinach, and Acorn Squash Flatbread
Adapted (a lot) from Smitten Kitchen

1 1 pound Acorn Squash
1 tbsp Balsamic Vinegar
2 tbsp Honey
1 tbsp Olive Oil
A generous grinding of black pepper
A light sprinkle of salt
1 cup Spinach
1/2 block Roquefort (about 1/4 cup, plus more for sprinkling)
1/2 Trader Joe's Pizza Dough OR enough dough for an 8'' Diameter Thin Crust Pizza

Pre-heat the oven to 375 degrees. Cut your acorn squash in half, scoop out the middle, and then cut it into half-moons. Peel these, then cut the half moons into chunks (about 1 inch, they can be rough).* In a medium bowl, mix together the balsamic vinegar, 1 tbsp of the honey, olive oil, black pepper, and salt. Dump in the chunks of acorn squash, and mix them around, until they are all thoroughly coated. Lay them flat on a baking tray (covered with foil if you don't want it to get dirty). Pour any remaining liquid over them. Place them in the oven and let them roast for about 20 minutes until they are just fork-tender. Take them out and let them cool while you finish the rest of the steps. Raise the heat of the oven to 425 degrees.

Shred your spinach and place it in a bowl with the Roquefort, crumbled up, and the last tablespoon of honey (I used the same bowl again to get those last drips of marinade). Massage the spinach into the cheese, until it looks almost like a spinach dip.

Stretch out your pizza dough (I generally just drizzle some olive oil on my baking tray and stretch the pizza dough until its as thin as possible, without tearing, and fits in the middle of the tray) or roll it out to an 8'' diameter pizza. Top it with the spinach and cheese mixture and the pieces of acorn squash. Dot with some extra crumbles of Roquefort cheese if you would like, and place it in the 425 degree oven for about 10 to 15 minutes, until the crust is crispy and the cheese is golden on top. Let it cool on the pan for ten minutes, transfer to a cutting board, cut and eat!

*Note: You can tell by my pictures that I forgot to peel them. Peeling all those little chunks when they were hot out of the oven? Painful.

Sunday, December 4, 2011

High Culture, Low Culture


     What an unassuming thing is a simple loaf cake. In my English class, one week we talked a lot about high culture versus low culture. High culture: old French movies, the Louvre, reading Canterbury Tales and schmancy poetry while wearing stilettos and sipping on a glass of wine. (Schmancy is now a word, just saying.) Low culture: the first two Saw movies (yes, I liked them....they make me queasy, they make me want to run away, but I like them), sitcoms and rom-coms, your warmest fuzzy slippers that you always wear even though you mean to get rid of them.


    All this thinking about high and low culture, like thinking about most everything in Me-land, got me thinking about food. High culture calls for macaroons, dainty French pastries, things that look like this. Low culture food? Hamburgers, french fries, banana bread...the comforts of life, the delicious familiarities. Apparently also the American versus the French in Me-land, I am a Euro-snob? I am turning into a total American???? Sigh, let's get out of my head now.

     In class we said that high culture forces you to think, teaches you something new. Yes, trying Pear and Asparagus Pizza (asparagus seems classy) is enlightening to me, I am broadening my eating and cooking horizons. Chocolate chip cookies? Not so much. That's more of a low culture thing. A feel good, I know what I'm getting and BOY does it make me happy kind of a thing.


     So what do I want out of life? I suppose that is the whole problem. Do I want easygoing home food? Or do I want to try fancy (I didn't say schmancy this time!) new things? Pushing the limits is fun, buying artichokes and asparagus and eating aged cheese is thrilling. But, I can't always hit that note. I cannot watch depressing foreign movie everyday, in fact most of the time it takes me forever to get around to watching those at all. Today was a fuzzy slippers and Friends kind of day, obviously, it was a simple loaf cake kind of day.

     And that's what popculture, pop-food - not going to say popcorn because that's just too easy...haha very funny me- is for right? Comfort. Analyze it if you will, but it will always be there for you, just like a warm slice of this delicious bread, studded with dried cranberries, with a hint of lime and sweetness, eaten cuddled up on your couch, a mug of tea in your hand. Or at least, it will be there for you until it is all gone...every last crumb. And then you can bring on the stinky cheeses.
Cranberry Lime Loaf Cake
Adapted (a lot) from Allrecipes.com

1 cup All-Purpose Flour
1/2 cup Brown Sugar
2 tsp Baking Powder
1/2 tsp Salt
1 cup Dried Cranberries
1 1/2 tbsp Lime Juice
1 tbsp Honey
1/3 cup Vegetable Oil
2/3 cup Milk
1 Egg, Beaten in a separate bowl

Pre-heat the oven to 350 degrees and butter a 9 by 5 loaf pan. In a large bowl, whisk together the flour, brown sugar, baking powder, and salt. Next, stir in the cranberries, beaten egg, lime juice, honey, milk, and vegetable oil. Stir until just mixed, making sure all the flour from the bottom of the bowl is combined, and then scrape into the loaf pan. Bake for about 1 hour, until a toothpick (or plastic knife) inserted in the center comes out clean. Once done, cool in the pan for 10 minutes, and finally remove onto a wire rack to cool completely. Cut and serve!

Friday, December 2, 2011

Adoration


     I have a tendency to adore people I do not know. Give my heart to them and feel like I could follow them around just to listen to them talk. Like Anthony Bourdain (travel channel host? majorly awesomely awesomeness? I've talked about him before? Go watch his show already!). He probably doesn't even like his twenty-year old girl fans. They are probably not people he can talk to his wife about. How do celebrities do that? "Hey honey, there is this twenty year old girl who wants to follow me around everywhere." Would Anthony Bourdain's wife feel compelled to hit him with a frying pan? Or maybe she's just chill with it now.


     But, I suppose I will never get to follow him around. In fact, that would probably be creepy for everyone concerned. Just like if I offered to follow Ian McKellen around. Or, more relevantly, Joy the Baker or Deb from Smitten Kitchen. Which is really what this post is all about. Not...that I really have the chance to meet them. No, not that *shakes head sadly.* And that just made what it is about so anticlimactic: which is nothing more than the fact that I commented on the Smitten Kitchen Blog and Deb replied! And then I totally skipped around the kitchen. And everyone else who knows that she replies to a ton of comments is looking at me skeptically - but it is good to be happy about little things! Isn't it? Especially if being happy about the fact that one of your idols thought you had a really good idea about her recipe inspired you to actually make said recipe?

     So, what this boils to is that I made the most awesome pumpkin pie ever for thanksgiving as inspired by Deb's Baked Pumpkin and Sour Cream Puddings. It was....perhaps not the most beautiful pie: it was not bright orange, it was not too tall. But, my family sure ate it fast - for dinner, breakfast, lunch, and every time they passed it on the kitchen counter. Probably because, though rich, it doesn't taste too rich at all. Instead it is pure fall comfort- all gingery gingersnap crust and cinnamon and nutmeg and pumpkin, with that layer of sour cream on top (Deb's genius) giving just the right tang-- also giving the ability to eat more and more because the sweetness of the filling never gets the chance to overwhelm you like regular old pumpkin pie used to do to me. Obviously, regular old pumpkin pie is not something I plan to go back to.


Pumpkin Pie with Gingersnap Crust
Adapted from Smitten Kitchen 

For the Crust

32 Regular Gingersnap Cookies OR 1 pack Anna's Ginger Thins (the kind you get at IKEA)
1/2 Stick of Butter (i.e 4 tbsp), Melted 

Pre-heat the oven to 400 degrees F.

Break your gingersnap cookies up with your fingers into the food processor, then grind them to a fine crumb. You should get about 1 1/2 cups of crumbs. Next, add the melted butter and run the food processor until the cookies are moist. You may need a little extra butter. Then, press the crumb mixture into the bottom and along the sides of an 8 in (if you want a taller pie) or a 9 in pie pan or glass dish (like I used). Make sure there are no holes in the crumb crust, and press it down firmly so it doesn't crumble. When finished, put the pan on a rimmed baking sheet.   

For the Filling

1 15 oz can Pumpkin Puree
3/4 cup Brown Sugar 
1 tsp Cinnamon
1/4 tsp Nutmeg
1/2 tsp Ground Ginger
1/4 tsp Ground Cloves
1/2 tsp Salt
3/4 cup Milk (I used 2%)
3/4 cup Light Cream
2 large Eggs, beaten together lightly

In a food processor, blend the pumpkin, sugar, salt, and spices for about 30 seconds. Pour the mixture into a medium saucepan at medium-high heat, until it begins to simmer. Then, cook it for another 5 minutes, stirring frequently. Once the mixture has thickened and gotten slightly darker, reduce the heat to medium-low and whisk in the milk and cream slowly. Once they have been combined, take the saucepan off the heat and whisk in the eggs. Pour the filling into the prepared crust. Bake the pie on the rimmed baking sheet for 50 to 60 minutes, until the middle does not shift too much when the pie is moved.

For the Topping 

1 cup Sour Cream
1/2 tbsp Granulated Sugar 
1/4 tsp Vanilla Extract

While the pie is baking, mix together the sour cream, sugar, and vanilla extract in a small bowl. After the pie is done, take it out and quickly use a spoon or spatula to spread the topping in a thin layer over the entire pie. Don't worry if it starts melting a little, just get all the topping on. Once the pie is covered, place it back in the oven on the baking sheet for 7-8 more minutes. Then, take it out and allow it to cool to room temperature for 2-3 hours, so the filling can set. Cut and eat!

Also! Look at my beautiful sparkly blue nail polish! Double awesomeness.

Thursday, December 1, 2011

Welcome Back


     I suppose this is really a welcome back to myself. I have taken a rather long break...in fact I didn't mean to take a break at all. I had all sorts of recipes and posts to put up before Thanksgiving...and during Thanksgiving...and this week. But, being at home makes me so internet-free. So lazy and comfortable and able to have a good time that well, I hope you forgive me for not blogging.


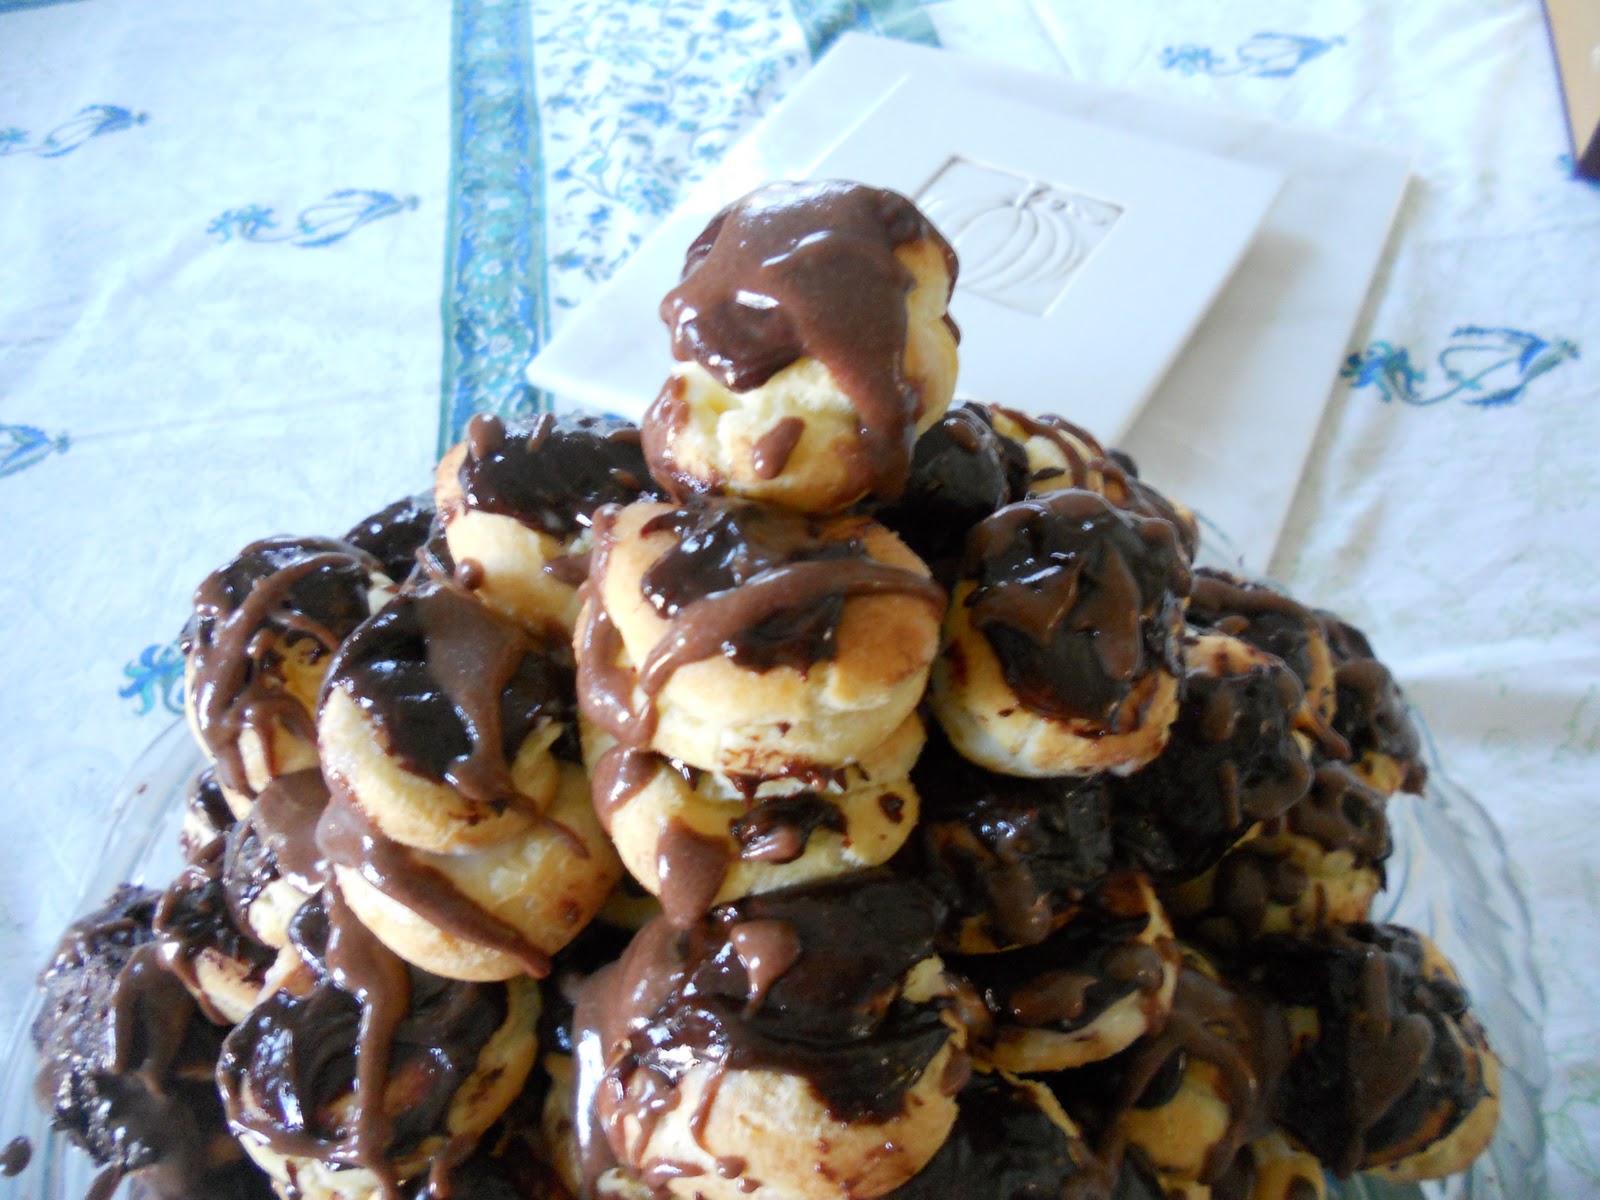
     All I've brought you back from home (that would be Boston!) today is this croquembouche I constructed with my mom to take to Thanksgiving at my aunt and uncle's place. Isn't it a beauty? Ricotta pastry cream stuffed cream puffs covered in chocolate ganache and then....well and then drizzled with more chocolate. Yum yum yum. I hope your Thanksgiving was just as enjoyable as mine, and I will have a new recipe tomorrow! Huzzah.