Places to Go

Showing posts with label Cake. Show all posts

Monday, March 19, 2012

Spring Time!


     Good God, has it actually been a month? I missed all you lovely people. I missed cooking and I missed photographing, but most of all I missed writing. Writing English essays is one thing, writing endless reactions over and over again (organic chemistry anyone?) is something entirely different, but writing these blog posts keeps me sane. Oh the joy of writing what I Want to write! Of spilling out what I really and truly feel. Thank you for being here to read my ramblings, thank you oh so much.


     And here with my ramblings I am back to present...another cake! I seem to be on some kind of cake-roll, but when I am stressed beyond belief, cake is my savior. Cake makes me happy, baking cake gives me an opportunity to blast music and sing and run around the kitchen while its in the oven...and end up with such a delicious product! I know its not the healthiest option, but my sweet tooth will never understand.


     This cake is also so seasonal. The sun is shining almost too brightly, I'm wearing a skirt and a tank top, and I bought a whole pineapple from Trader Joe's on Friday! I have never bought a pineapple before. I'm not sure if or when I've even eaten fresh pineapple before. Let me tell you, I was intimidated when it came down to cutting and peeling and coring this thing, but thankfully I just followed Deb at Smittenkitchen's step by step pictures.


     I also came up with this cake recipe (almost) all by myself! I based most of the ratios off of Deb's recipe but the effect is entirely different. Oh my this cake was so good. I wanted something light, something I could eat for breakfast and with tea, after lunch and after dinner, and never get tired of. Boy, did I succeed. (Did I really just say Boy? Writing again makes me overly euphoric..) Bursting with pineapple chunks, moist beyond belief, and just barely sweet, this cake keeps you coming back for more and more and more. Just like writing is going to bring me back again so soon!

 
    Happy Spring time!


Pineapple Chunk Cake
Very loosely adapted from Smittenkitchen

1 Medium Pineapple
1 1/2 cups Water
3/4 cup Granulated Sugar
2 tbsp Rum (I had light, but I bet dark would be good)
2 cups All-Purpose Flour
1 tsp Baking Powder
3/4 tsp Baking Soda
1/2 tsp Salt
1 stick Unsalted Butter (or Margarine)
2 Large Eggs

First, cut off the top of the pineapple and quarter it lengthwise. Then, core it by cutting out the middle section, and peel off the skin making sure no knobs are remaining. I then cut the pineapple quarters lengthwise in half again, and just chopped those up. If you would like smaller chunks of pineapple in your cake, dice more finely, it is up to you!

In a large saucepan, heat the water, 1/4 cup of the sugar, and the rum at medium heat. Once it is boiling, stir to make sure all the sugar is dissolved. Then, add in your pineapple chunks. Reduce the heat to medium low, and allow the pineapples to simmer in the syrup for 15 minutes. Then, turn off the heat and transfer the pineapple chunks to one bowl and the syrup to another. Let them cool.

Meanwhile, pre-heat the oven to 350 degrees and butter a 9-in cake pan. In a medium bowl, whisk together the flour, baking soda, baking powder, and salt. In another large bowl, cream together the butter (softened first in the microwave) and the remaining 1/2 cup of sugar. Add to this one egg at a time, beating thoroughly after each addition. Next, stir in 1/2 cup of the syrup, then fold in 1/2 of the flour mixture. Repeat this once more so you have incorporated 1 cup of syrup total, stirring just until everything is incorporated. Last of all, fold the drained pineapple chunks into the batter (the remaining syrup will be used as a glaze). Bake the cake for 35-40 minutes or until a toothpick stuck into the middle comes out clean. Take it out and allow it to cool in the pan on a wire rack for 10 minutes. Then, turn it out onto the rack. Place a large plate or cutting board under the rack, and pour the remaining (I know its super watery) syrup carefully all over the cake - you want as much to soak in as possible. Once that is done...try to wait for it to cool at least 5 minutes longer. Then eat! Or let it cool all the way if you can.

Sunday, February 5, 2012

Happy House


     It's been awhile.... A long while. There's the usual run of excuses to give - I had winter break! Then I came back! School started! And the more realistic - I was so exhausted when I got home I barely cooked. I was so overwhelmed when I got back to school that blogging seemed like a chore. Thankfully, I have put that all behind me - courtesy dropping a class and realizing No, there are not 30 hours in a day.


     Everything is settling down. Philly is looking beautiful again, and my stove ridiculously inviting. But not as inviting as my oven. I know that the last thing I posted - oh so long ago - was a cake, but I couldn't resist. I want to celebrate being back. This is my little internet home, and I wanted a little homey cake to go with what I can't help but consider my (hopefully permanent) return.


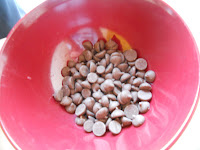
     I actually had no idea what kind of cake to make once I started thinking about blogging again, but there I was helped out by my little sister in the Big Brother Big Sister type program that I'm in. This week when I saw her, she really wanted to make a vanilla cake. And when we went grocery shopping, it was entirely her idea to buy a bag of Hershey's Mini Kisses. Inspiration comes from all sorts of places, and it was a good thing she was around because this cake would not have been half as amazing without her.


    So, we worked busily and produced this giant of a cake. Can't you just tell that it made the apartment smell heavenly? Golden crumbed on the outside, almost like cornbread as my assistant said, and densely vanilla-y inside with little chocolate chunks, it might have been lovely on its own. But we didn't stop there. I made a thick chocolate cream cheese filling and chopped almonds into it. Cutting the cake in half (Not very expertly...) and filling it was fun, eating it was so much more.


     I took it to a potluck at my friend's place, a house aptly named Happy House, and there it was happily devoured. That was really all I needed to blog again. I love cooking and I missed it....but more than that sharing my food and hearing how much people liked it reminded me that what I love most about blogging is sharing with all of you, and the thought that maybe someday you can share these foods with others. I hope you make this cake and it makes you as happy as it made me! It's good to be back.


Happy House Cake

For the Chocolate Chip Cake:
Adapted from Smitten Kitchen

4 cups All-Purpose Flour
2 tsp Baking Powder
1 1/2 tsp Baking Soda
1 tsp Salt
1 cup Softened Butter (I use Smart Balance...just to make myself feel better)
1 3/4 cup Sugar
2 tsp Vanilla
4 large Eggs
2 cups Milk
4 oz Mini Hershey's Kisses (or chocolate of your choice) 

Pre-heat the oven to 350 degrees. Butter a 9 by 13 pan and line the bottom with parchment paper (or you can use two 9 in cake pans if you want to make a layered cake), make sure to butter on top of the parchment as well. 

In a medium bowl, whisk together the flour, baking powder, baking soda, and salt. In a separate large bowl, use an electric mixer to beat together the butter and sugar until it is fluffy and a lighter cream color. Next, beat in the vanilla, and the eggs one at a time. Make sure everything is well mixed. Then slowly pour in the milk while beating at low speed. Your mixture is going to look supremely curdled. Once the milk is combined, add the flour mixture in three batches. Use the mixer on low to mix in each addition until it is just incorporated, no need to overmix. Pour your batter into your cake pan and spread it evenly. Lift your pan up an inch off the table and drop it down to pop any air bubbles. Then, place it in the oven for 45-50 minutes until its golden brown. While it is baking, start on the frosting.

Start checking the cake at 40 minutes but it might take slightly longer to bake. It is ready when you can insert a toothpick in it and it comes out clean. Place it on a wire rack once done, and let it cool in the pan for 10 minutes. Once it has cooled, run a plastic knife around the edges and upturn it onto the rack (if you have one that large). I just let mine finish cooling on a large cutting board.

For the Filling:

6 oz Mini Hershey's Kisses
1 tbsp Butter
1/4 cup Milk
5 tbsp Cream Cheese
1/3 cup Almonds, Finely chopped

Place the chocolate and butter in a small saucepan at medium heat. Mixing with a wooden spoon, let all the chocolate melt. Once it is melted, whisk in a couple of tablespoons of the milk. Next, whisk in the cream cheese (Note: if you would like, you can pre-whisk the cream cheese in another bowl or with an electric mixer so it is fluffy and you don't have to work so hard whisking it in by hand into the chocolate). Once the cream cheese is thoroughly incorporated, it is up to you. I wanted a fairly thick filling, but one that would easily spread through the cake and have vaguely the consistency of a pudding. So I whisked in slightly less than 1/4 cup of milk, and kept whisking and cooking it until it reached that. If you like a slightly thinner, more ganache like filling just add more milk. Once your filling is ready, whisk in the almonds.

To put the Cake together

Once the cake has cooled completely, place it on a cutting board and make sure you have another large cutting board or plate nearby. Use a long serrated knife to divide the cake into two layers. For me, this is easiest to do just going around all four edges, making sure the knife goes in as far as possible so you cut the middle in half as well. Carefully lift off the top and place it on your other cutting board or plate. Using a large spoon or spatula, dollop your filling out onto the cake. Use your utensil to evenly coat the entire cake. Once that is done and all your filling is used up, place the top of your cake back into place. Now cut a slice and eat!

Wednesday, August 3, 2011

Summer Time


     There is a bag of strawberries in my freezer. And every time I pull out the freezer drawer, it stares at me as if to ask: "What am I still doing in here while you are in the kitchen? Why the *bleep* (tis a foulmouthed strawberry bag) haven't you used me yet???" For the past few days I have stared back at it sadly. I have made lame excuses. "I am sorry strawberries, I just got back from work." or "I am sorry strawberries, it is too hot to move." or worst of all: "I am sorry strawberries, but I just don't feel like cooking." Since when did I turn into this person??? Today, the strawberries will not be ashamed of me.


     So, what did I do to make them happy and smiling again? (Sometimes, metaphors just keep going and its hard to know when to kill them....Forgive me Internet.) Well, I turned them into cake! Strawberry Cake. How delicious does that sound? And this was not any strawberry cake. It was not strawberries pureed into a cake or homemade strawberry jam (someday, I will tell you this story) to put into a cake, it was a cake dimpled with Huge Strawberry Halves. Yum.


     This cake was baked last night. Because I was in a foul mood, and the idea of a strawberry cake and making the strawberries happy was just too much goodness for me to deny. Also, I feel awful about my slow blogging pace. Must. Buck. Up. Anyway, last night I decided to make this cake. This morning, my mom had a meeting at home, where she was serving tea - and cake. If I go home from work to find out that my entire strawberry cake (not counting the giant piece I ate with my mom and brother shortly after it came out of the oven of course) is gone, I will be a not so happy blogger.


     But, how could I blame anyone who wanted to eat this entire cake. First of all, I didn't just put strawberries in it. I also put raspberries and blueberries (we had a frozen berry medley in the freezer). And I used brown sugar instead of all granulated sugar.


     It turned out so well. I told you I was in a foul mood, didn't I? I was letting there be lumps in my batter (only small lumps...) and I was making my little brother take all the pictures (isn't he great!!! Yay GS!), but this cake made me happy. Warm out of the oven, it tasted like summer. Like cobblers and crumbles and all those lovely desserts, like fruit and a touch of sweetness. It was just a cake, but it was a homey, not rich but comfortable, berry-ful cake. And best of all, it was so easy to make I could make another one TODAY. But of course I wouldn't...I think.


Strawberry Summer Cake
Adapted from Smitten Kitchen

6 tbsp Butter (or Smart Balance or margarine, i.e. what I used)
1 1/2 cups All-Purpose Flour
1 1/2 tsp Baking Powder
1/2 tsp Salt
1 cup Brown Sugar
2 tbsp Granulated Sugar
1 Large Eggs
1/2 cup Milk
1 tsp Vanilla Extract
1 cup Strawberries (fresh or frozen)
1 cup Mixed Frozen Berries

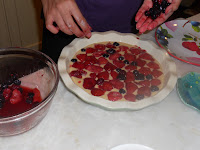
Pre-heat the oven to 350 F and butter a 9'' deep dish pie pan (or a regular 10'' pie pan if you have that). First, make sure your berries are defrosted if you are using frozen berries. Then, cut the strawberries in half lengthwise (as shown above). Next, in a small bowl, whisk the flour, baking powder, and salt together. In a large bowl, beat together the butter and brown sugar until it is pale and fluffy (it will take a while). Then, mix in the egg, milk, and vanilla until just combined. Add the bowl of dry ingredients slowly, mixing until the batter is smooth. Pour the mixture into the prepared pan. Arrange the cut strawberries in the batter, cut side down, in a one-layer pattern. Fill in the gaps with the other berries, cut them if they are too big. Sprinkle the two tablespoons of granulated sugar over the berries. Place the pan in the oven at 350 degrees and bake for ten minutes, then reduce the heat to 325 and bake the cake for another 50-60 minutes. It should be golden brown and a toothpick stuck in the center should come out clean. Once it is baked, let it cool on a wire rack for five minutes, then cut it into wedges and serve!

Thursday, April 28, 2011

Long Overdue


     I completely forgot about this banana bread. How could I forget banana bread? It is so comfy and homey, but it just totally slipped my mind. I think its this summery weather. Banana bread is a throwback to those chilly breezes of a week ago, now all is hot. Unfortunately, today it is hot and humid. I was supposed to leave work an hour ago, but I'm just sitting here chilling while the rain thunders on outside. Go rain go, I am safe inside.


     What do I have to say about this banana bread? I wish I still had some. I am starving...ahhh so hungry! I would totally venture outside to go food hunting, if I didn't have this precious laptop with me. Silly laptop, why are you so fragile? The poor thing is already cracked around the edges because I have dropped it so many times, I would not want to get it wet. I am also obviously not focusing. What was I talking about again? Oh right. Banana bread. That I finished. Which also finished a lot of my baking supplies:


     I suppose it is to be expected that after you make three layers of a cake and a banana bread, you will not have any flour or butter left. The butter is a sad thing though, it is very hard to eat bread without butter. So, what was the alternative? 


Monday, April 18, 2011

The Great Cake Part I: Butterscotch


     What is this Great Cake you ask. How can there be Part I of a cake? Is Part II just icing? No, that would be lame people. (Though of course there will be an icing part eventually). The Great Cake is a cake I've been planning for a while now. It is the cake for my last English class. You know, the class I talk about all the time? The one where I get to read and write children's books? It's going to end. This is amongst the most distressing things in my life right now, the fact that this class is going to end. And you may think that is silly but it is not just me- you should have seen the faces of everyone in my class when my professor that we wouldn't have a writing assignment due this week because it was the last class. We looked like someone had died. Puppy dog faces all around.


     So, we are having a party on the last day of class. People are bringing food (like crazy sounding kinds of pretzel which I am quite excited about), and I am bringing the Great Cake. So what is the Great Cake going to be? It is going to be three layers: Butterscotch, Banana, and Chocolate. The icing, well I have yet to decide that. Suffice to say it will be delicious. And today, we are starting at the beginning: Butterscotch. Why are we starting with butterscotch? Because I always knew what recipe I was going to be using for the butterscotch cake layer, and I wanted to make it NOW.


     This recipe and I go far back. For one thing, it is a Nigella recipe. Have I talked about Nigella Lawson yet? Domestic Goddess extraordinaire from Britain? She is probably one of the main reasons I started baking so much. I got completely obsessed with her book, How to be a Domestic Goddess, I think freshman or sophomore year of high school. Whenever I thought of making anything, it came out of that book. Cakes for every family member's birthday, desserts for every dinner party, Nigella was always my first go-to person. So, Sophomore year, when I had to decide what cakes to make for my grand birthday sleepover (of course I had a grand birthday sleepover, do you doubt it? Me and SZ, HJY, KK, GR, LL, and PL - I love that I have already mentioned most of these people and I have had them around for so long, it gives me a warm fuzzy feeling inside) they came out of Domestic Goddess. They were a chocolate mousse cake, snickerdoodles (which aren't a cake, but it was important to have a non-cake dessert as well - to me), and the Butterscotch Layer Cake.

Sunday, March 6, 2011

The Best Kind of Carrots

Deconstructed Carrot Cake
  
     I know I have already written an ode of sorts to carrots, by which I am referring to my Carrots post of course. However, those carrots were not in the form I most prefer them. They were savory carrots, not sweet carrots. Actually, I take that back, I managed to put honey even in my savory carrot dish? I am obviously biased. Carrots belong with sweets. Most of all, carrots belong in Carrot Cake.

Work Station: So Well Lit!
     Carrot cake has always been one of my favorite desserts. I don't know where I first had carrot cake, or when I first fell in love with it. But, I do know there is something about the carroty flavor and the cream cheese icing that just calls out to my heart - and my stomach. I do love a good cake!


     Oh, and the joy of having large pans? I can't tell you how lovely it is. No more loaf pan for a little while! The little comforts of home are innumerable. Like having enough bowls that I don't have to keep washing the same ones and getting to watch TV while cooking. But most importantly: my little brother GS (not so little anymore at 5'6.5'' and taller than me) is here to lick the bowl for me! It was no fun at school making cakes without him to eat the batter. Yay GS!

     However, I do need to tell you, I just couldn't follow the carrot cake recipe. Between having no crushed pineapples - I used a mix of canned apricots and mandarin oranges - and not liking icing that is too sweet, I did alter a bit. The recipe includes both my changes and the original because I have made Wooden Spoon Cookbook's Carrot Cake before and it is just delicious, I was just fiddling for myself.
My favorite Sous Chef!
     What can I say about this carrot cake? The substitutions did it no harm at all. It is sweet, but not too sweet. It is the carrot cake - cream cheese pairing I could not live without. It is everything I want to eat in large slices, and not save for the party of 8th grade boys (my brother and his friends) coming over tomorrow. So, we just cut layers off the top and dipped them in cream cheese frosting and ate them. I had to taste test right! Still, carrot cake flavor is supposed to improve for the next day. I guess I will just listen to the cookbook for once and not gobble up its deliciousness. Which means, pictures of the finished product will come tomorrow!

California Carrot Cake 
Adapted from The Wooden Spoon Dessert Book by Marilyn M. Moore 

For Carrot Cake: 

1 can Crushed Pineapple packed in Juice OR 1 cup Mixture of Crushed Canned Apricots, Mandarin Oranges, Pineapples, etc. Packed in Syrup
4 Large Eggs 
1 cup Granulated Sugar 
1 cup Light Brown Sugar 
1 cup Vegetable Oil 
2 cups All-Purpose Flour 
1 tsp Salt 
1 tsp Baking Powder
1 tsp Baking Soda 
2 tsp Ground Cinnamon 
2 cups Grated Carrots 
1/2 cup Chopped Pecans or Almonds or Other Nuts 

     Pre-heat the oven to 350 degrees and grease a 9'' x 13'' pan. In a large bowl, beat the four eggs thoroughly until they are lemon colored. In a separate bowl, whisk the two kinds of sugar together, and push out any lumps. Then, beat the sugar into the eggs. While mixing, pour the vegetable oil into the egg and sugar mixture in a small stream, so they are all combined. In a medium bowl, whisk together the flour, salt, baking powder, baking soda, and ground cinnamon. Mix this dry mixture into the wet mixture a little bit at a time, until it is all combined. Next, stir in the carrots and then the chopped nuts. Once everything is combined, pour the batter into the prepared pan. Put it in the oven to bake for 55 to 60 minutes, until it is brown on top and a toothpick pushed in comes out clean. Meanwhile, make the frosting. Then, take the cake out, and leave it on a wire rack to cool. Once cooled, frost!

For Cream Cheese Frosting:

3 oz Cream Cheese 
4 tbsp Butter 
1 tbsp Pineapple Juice or Apricot Syrup or Whatever the fruits you used were packed in 
2 cups Confectioners Sugar (or 2 1/2 cups and no cheese) 
2 tbsp Ricotta Cheese

     Blend the cream cheese, butter, ricotta cheese, and juice together. Then, sift in the confectioners sugar and combine thoroughly. You are now ready to frost your cake!

Monday, February 28, 2011

A Visitor in the Kitchen Part II: Dessert

Dessert on Display (and me sitting back to enjoy)
      I do not believe that a meal is complete without dessert. My roommate AT asked me yesterday what food I would pick if I could only eat one food for the rest of my life. My answer? Something sweet. I don't think I could live without cakes and cookies and chocolates; my sweet tooth is far larger than my um... love... of healthy living. But, just because I like sweet things, doesn't mean that the desserts I like are always overwhelmingly sweet. The cakes I have made so far are good everyday cakes, the kind you could have for breakfast or with a cup of tea. The cake I am making today falls right into this category, it has the same amount of deliciousness with an extra dash of sophistication.


     What cake is this? Blood Orange Olive Oil Cake. You know, I saw this recipe on Smitten Kitchen, and I knew right away that I had to make it. I haven't had an olive oil cake for a long time, and the lovely fragrance of the oil really elevates the homey-ness of loaf cake. Apparently, other people don't feel the same way. People were so confused when I told them what I would be making. Apparently olive oil cakes are not common? Apparently people are not sure what blood oranges are and many people have never had one? I guess I am a foodie after all.


     I was actually almost positive I would be making this cake without the blood oranges because where in the world would I buy blood oranges? Reading Terminal, apparently. It is the best place ever, do not ever come to Philadelphia without visiting it. Anyway, point being, after my little Chinatown trip with PN, we went to Reading Terminal and ate a scrumptious apple dumpling, and I bought more fruits and veggies. And blood oranges! Aren't they just gorgeous?


     Everyone who has not had a blood orange really should. They are milder than regular oranges and generally sweeter, but if you put them in dishes, or make a sauce from them, or just cut them up and then stare at them for a bit, their color alone is worth it.


     Making the cake was tons of fun with Katch around. She took so many amazing pictures I didn't know which ones to choose! We listened to high quality music (Disney songs), and I danced around because that is what I do in the kitchen, and apparently I can't stop myself even when other people are around. I also made up an absolutely delicious sauce using fresh blackberries and the leftover blood orange. Then, once the dancing and the orange cutting and the sauce making was all over, we ate cake!


     It was ridiculously moist, it had that depth of flavor from the olive oil (Katch couldn't taste the oil, so if you have never had an olive oil cake just know the flavor is not overwhelming, it just adds another tone to the cake), and it had that sweet citrus taste. The little orange segments in some of the slices were amazing too, next time I make it I might just add more so I don't have to hunt for them. Though, if hunting always involves eating more pieces of cake till I got to a part with orange segment, so be it. The blackberries also worked amazingly in the sauce, which added a whole new sweet tanginess to my creation. I love dessert, don't you? And definitely look at Katch's blog for her account of cake making: http://katchiree.com/blog/!


Blood Orange Olive Oil Cake with Blackberry Honey Sauce 
Adapted from Smitten Kitchen 

For Cake: 

3 Blood Oranges
1 cup Sugar 
1/2 cup Plain Yogurt 
3 large Eggs 
2/3 cup Extra Virgin Olive Oil 
1 3/4 cups All-Purpose Flour 
1 1/2 tsp Baking Powder
1/4 tsp Salt 
1/4 tsp Baking Soda

     First, pre-heat the oven to 350 degrees and butter the loaf pan. Next, pour the sugar into a large bowl. Grate the zest from 2 of the oranges and put the zest in the bowl with the sugar. Rub sugar and zest together with your fingers so the zest is distributed throughout the sugar. Then, supreme the two oranges. To supreme: cut the top and the bottom of the orange so that it can stand upright and you can see the fruit inside. Following the curve of the orange, cut the peel and pith away from it. Then, cut the segments of orange out of the connecting membranes and let them fall into a small bowl. Halve the third orange and squeeze its juice into a measuring cup. You need about 1/4 of a cup of juice. Then, add the yogurt to the juice until you have 2/3 cup of liquid together, and mix them. Whisk the mixture into the bowl with the zest and sugar. Then, whisk in the eggs and olive oil. 

     In another bowl, whisk the flour, baking powder, baking soda, and salt together. Stir these dry ingredients into the wet ingredients gently. Lastly, fold the orange segments into the batter. Pour the batter into the loaf pan, and bake the cake for 50-55 minutes till the top is golden. Cool the cake in the pan on a wire rack for 5 minutes and then unmold it onto the rack, allowing it to cool right side up for another 10 minutes. Cut, top with sauce, and enjoy!

Blackberry Honey Sauce

1 Blood Orange 
1 small box Blackberries 
2 tbsp Honey 
Black Pepper 

     Halve the blood orange and squeeze its juice into a small saucepan at medium heat. Next, add half of the blackberries to the saucepan. Using a wooden spoon, squish the blackberries against the side of the pan. Alternately, squish them in your hand as you drop them into the saucepan, as I did. Stir in the honey, and allow the sauce to come to a boil. Reduce to a simmer, add a dash of black pepper, and then stir in the rest of the blackberries. Allow the sauce to simmer for a few minutes, and then serve. 

Note: 

You could really make any sauce to compliment the cake, Smitten Kitchen made a blood orange honey compote. Use what you have on hand!