Places to Go

Showing posts with label tomato. Show all posts

Wednesday, November 17, 2021

When You Miss Mumbai


There are few places I miss as much as my family's home in Alibag. The pandemic changed so much for everyone. For me, it took away my India. Bougainvillea blossoms and coconut trees. Walking along our yard's parapet and watching the sunset. 

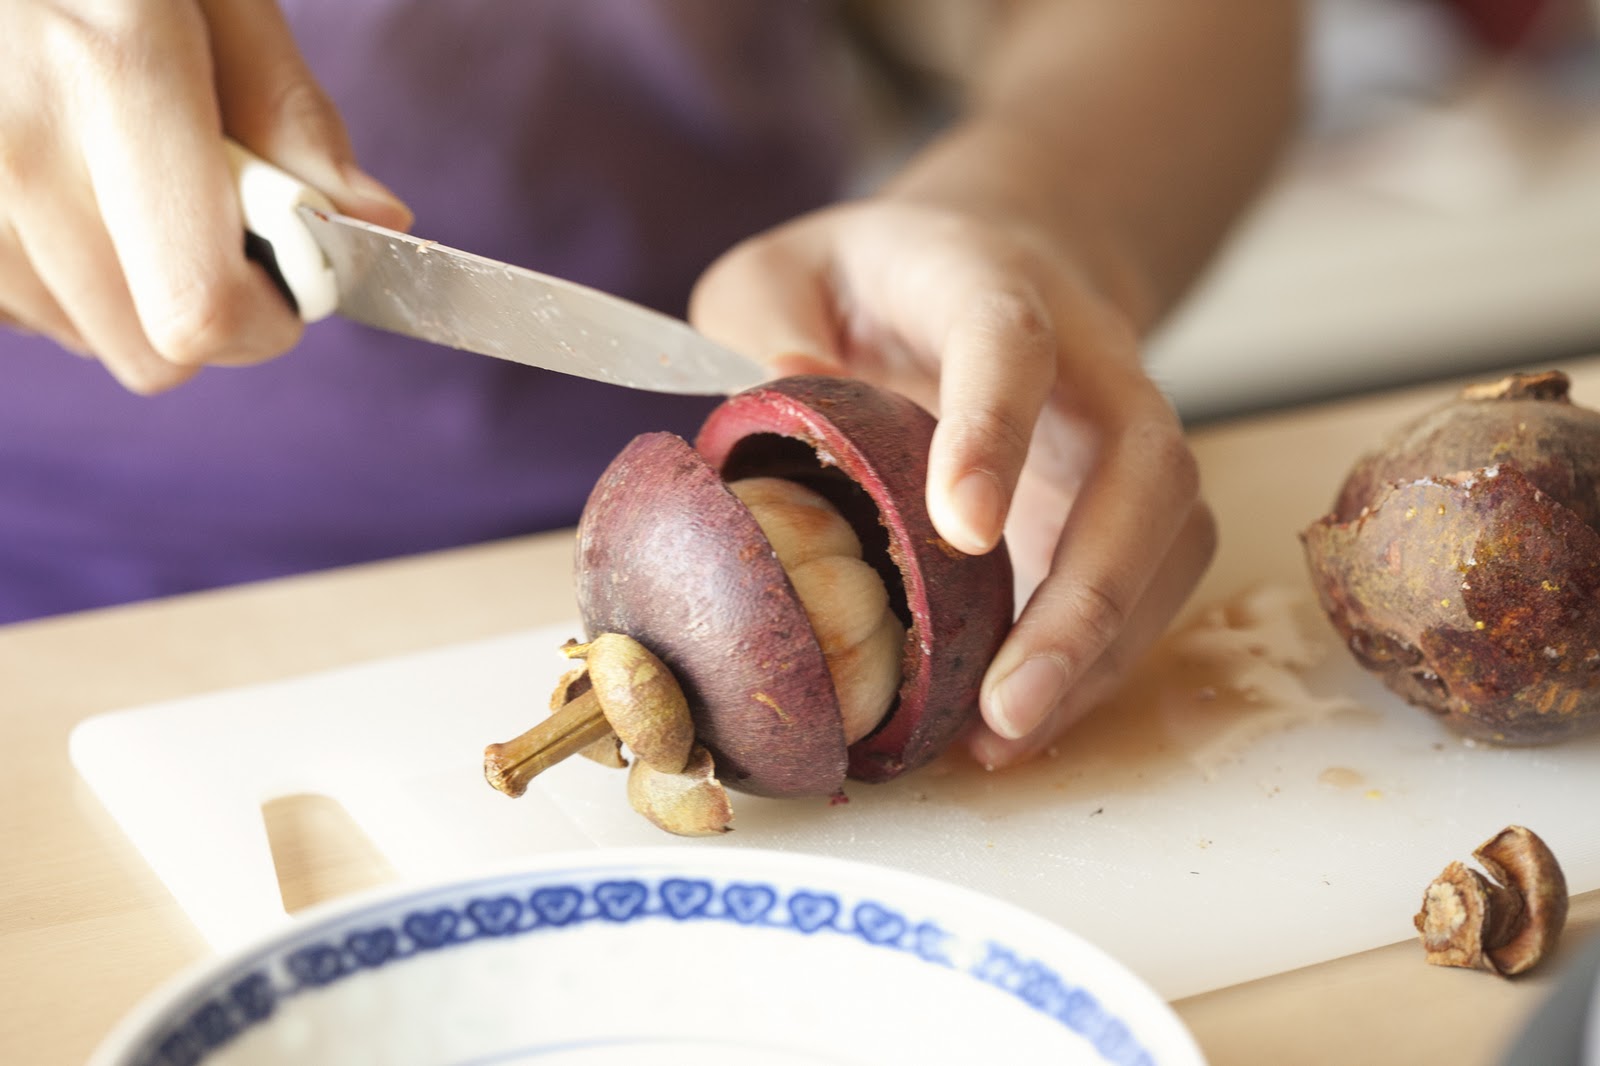
And the food. The tiniest shrimps in thick masala. Fish smeared in green chutney and steamed in banana leaf. Chikoos, my unbeautiful favorite fruit. 

Flavor memories are strong. Thankfully, one can cook to bring them back to life. 

I am also lucky in my friends in this new home. Living in the bay area means being surrounded by gorgeous produce. One of my friends brought home farm fresh tomatoes, and I reaped the bounty. (It fits the original theme of this blog, written as a harried student, that my board prep materials background the photo below). 

Mumbai is home to Parsis, and many Parsi cafes. Sometime in my life there, Parsi tomato jam embedded itself in my sense memories. I cannot recall the last time I ate it, even in recent trips to the big city. Yet, it calls forth monsoon and late nights watching the Queen's necklace twinkle. 


Alive with ginger, garlic, chili, cloves, cinnamon and bright tomato, it is my summers in a jar. This recipe made me enough to gift two medium-sized jars, and keep a big one for myself. I miss it already. But while it was in my fridge, my home in India was just a lid-twist away. 


Parsi Tomato Jam 

Adapted from Niloufer Ichaporia King's Recipe 


1.5 lbs ripe tomatoes, rough chop  

¼ cup julienned ginger (about 1.5in long piece)

½ head sliced garlic (about ¼ cup)

¾ cup vinegar (I used a mix of red wine vinegar and apple cider because that’s what I had; the original recipe calls for cider or malt vinegar)

1 cup brown sugar

½ cup of raisins (optional; I had dried cranberries about, so in they went)

1 tablespoon chili powder (I had Korean gochugaru which gave a deep smoky spicy taste; the original recipe calls for cayenne pepper or hot ground chili. This amount lends tasteable hotness, if you want a milder version add ~1/2 tbsp)

1 small cinnamon stick

3 whole cloves

teaspoon salt

Grated peel of one lemon (optional; also original recipe called for orange)


Roughly chop the tomatoes. Put them in a heavy bottomed pan with the ginger, garlic, vinegar, raisins (optional), sugar, chili powder, cinnamon, cloves, and salt.


Stir to combine everything, and bring the mixture to a boil. Lower the heat and simmer uncovered. Stir occasionally. You want the chutney to reach the consistency of a soft jam,


Niloufer’s original recipe calls for double the tomatoes (and 4 hours of simmering), but my halved recipe still took about 3 hours over very low heat. Low and slow allows flavor development, so try not to rush. 


When you take the chutney off the stove, adjust the salt, sugar, and vinegar to your liking. You can also add more chili if you seek a kick. You want to do this while its still warm. Add the lemon (or orange) peel at this time.


Niloufer recommends letting the chutney sit for a day to fine-tune the balance and allow flavor merging. I let it sit out overnight with the lid on in my cool kitchen, and it did beautifully.


I end with her words because everyone should read them:


“Remember that this is a chutney—it should be forceful, declamatory. You want a chutney to light up your mouth, to have some punch. Sweet! Sour! Salty! Hot! The biggest mistake with chutney is to think of it as a spiced jam. Never leave out the salt or undersalt in the name of some diet deity. I tend to give the chutney away as soon as I make it, so I don’t go to great lengths with the bottling process. I just put the jars and tops through the dishwasher and give them an extra jolt of boiling water before I fill them.”


I don’t have a dishwasher, so I just swirled boiling water around my clean jars and left them upside down to dry. The jam was finished within 2 weeks so I cannot vouch for the longevity of this process. I can vouch for the immediate consumption of the jam.
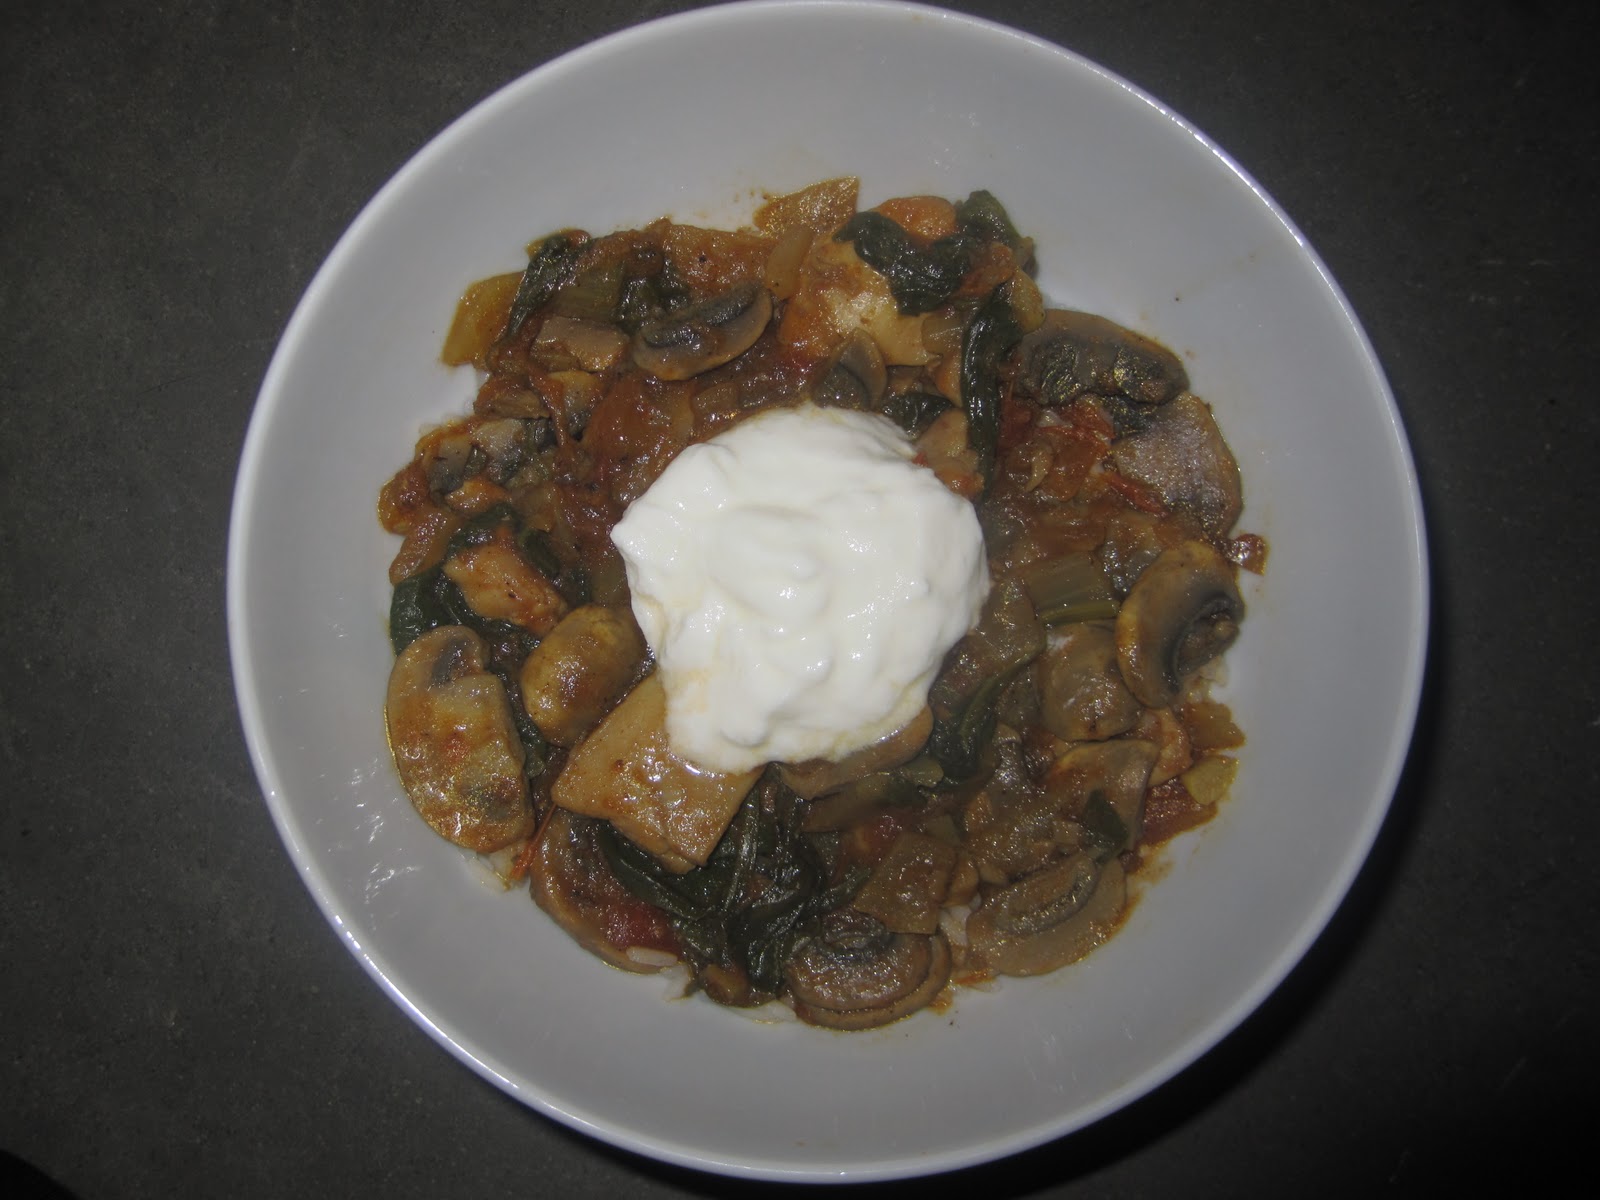
 

Ways it was eaten:

·        With eggs on toast

·        Scooped up on chips

·        On crackers with many different cheeses

·        Sandwich spread (chicken sandwiches, yum)

·        Straight with a spoon


Thursday, September 22, 2011

PIZZA!!!!!


     I love pizza. It makes me happy. The gooey cheese strands suspended in air as you hold up a perfect slice of Domino's (yes, Domino's!)...just the thought of it makes my mouth water. But you cannot have Domino's all the time. Especially if you are eating dinner by yourself on a week night, there are some limits to one's pizza eating capabilities- or mine at least.


     So what do I do on such weeknights? I make my own pizza! And why is this possible? Because I went to Trader Joe's and bought the amazing pizza crust! I am such an ad for their pizza dough. I've used it three times, in every one of my pizza recipes. I just can't help it, it's so convenient, and so good, and only a dollar! (Definitely also the third time I've said that.)


     I also had lovely fresh vegetables. There's something about a pizza loaded with tons of veggies but also some fresh mozzarella cheese that is just irresistible to me. It is so healthy! Obviously that's not why its irresistible though, sigh, that would be because of the lovely golden cheese. If things were irresistible to me based on healthiness life would be so easy. Instead my mom keeps telling me both sides of my family have diabetes, and I better watch out on the sugar. The desserts will be back though. Don't worry. I was healthy today, I can be unhealthy tomorrow!


     But for today, we are going to stick with my lovely mushroom, spinach, and tomato pizza. I didn't even use pizza sauce! Once you break out of the tomato sauce / cheese mold of pizza making, pizza can not only get a lot healthier, it can also come in endless forms. So, I just sauteed up my veggies, cut some nice slices of tomatoes and dried them out on the pan (otherwise you will get soggy pizza, I am sad to say), then dumped them all over my lovely pizza crust - which was off course brushed with olive oil. That makes up for a sauce all by itself. Then it baked. Then I ate it. And it was delicious. But that's redundant, you knew that already. How could it not be! So if you are staring at those fresh veggies with tired eyes, put them on pizza and everything will be OK again.


Mushroom, Spinach, Tomato Pizza

1 16 oz ball of Trader Joe's Pizza Dough
OR Enough Pizza Dough for a 12'' diameter thin-crust pizza 
2 tbsp Olive Oil 
1 Large Tomato, Cut into thin round slices 

1 cup Baby Spinach Leaves
1/2 cup White Button Mushrooms, Sliced
1 tsp Oregano 
1 tsp Basil 
1/2 tsp Black Pepper
1/2 tsp Salt 1/4 cup Mozzarella Cheese (I used half of the Ball of Mozzarella cheese you can get at TJ's)

If your pizza dough is in the fridge, make sure to take it out 20 minutes before you plan to use it. And pre-heat your oven to 425 degrees.

In a large frying pan, heat 1 tbsp of olive oil at medium heat. Once it is heated, add the spinach and mushrooms. Allow the spinach to wilt, then add the basil, oregano, and salt. Mix everything, cooking for about a minute. Then, place the spinach and mushrooms in a separate bowl. Take the thin slices of tomato and lay them on the bottom of the pan, allow them to cook for a minute on both sides, letting excess liquid run off the slices.

Take a large baking sheet and smear it with a little olive oil. Roll out the pizza dough a little and then put it on the baking sheet and press it down until it fills most of the sheet. Brush 1 tbsp of olive oil all over the top of the crust. Top it with the tomatoes, and then the spinach and mushroom mixture. Sprinkle the pepper over the top. Lastly, roughly shred the mozzarella if it was in a ball and sprinkle it liberally all over the pizza (if you want more than my recipe called for, go for it!) Then, bake it at 425 degrees for about 10 - 15 minutes, until the crust is golden brown and the cheese is golden. Take the baking sheet out and allow the pizza to cool on the baking sheet for a few minutes, then transfer it to a cutting board. Cut and eat!

Friday, September 9, 2011

Tomato Soup


     Grilled cheese and tomato soup. What could be a better dinner? Sometimes, I just don't know. And so, I give in - and that is exactly what I made for dinner last night.


     Pause: This was quite a long pause. Um, a couple of weeks to be exact? I made this dinner sometime in August for my family. But you know how it goes, it was summer's end, I moved back to school, started settling in, and the poor blog got left behind. But now I'm back! Hi world!


     This recipe is, after all, just too good not to blog about. I had never made tomato soup from scratch before, and I always assumed it would use something bad for you - like cream. Instead, all I used was veggies! Tomatoes, celery, potato, oh my! The potato is what gives this vegan soup its creaminess you see, we didn't need real cream after all. This soup still had the thickness and richness of tomato soup, but also felt hearty and wholesome. What more could one want?


     There's something about tomato soup that is so comforting. As I was standing stirring at the stove, on one of those inexplicably gloomy summer evenings, I just felt so content. The smells of rosemary and well...tomato soup, wafting up were as good as a massage. For the soul at least, my body would still like a massage. And after whipping up a few grilled cheese in the oven (good Italian bread, butter, and chunks of cheddar placed under the broiler for a few minutes do wonders for one's mood) and dunking them into the soup, I wished I could feel that way always and you could too.

Tomato Soup
Loosely adapted from The Innocent Primate Vegan Blog

2 tbsp Olive Oil
1 Small Red Onion, Finely Chopped
4 cloves Garlic, Minced
1 Celery Stalk, Chopped
1 Large Russet Potato, Diced (the bigger the dice, the longer you will have to cook it...)
2 tsp Salt
2 tsp Oregano
1 tsp Rosemary
2 tsp Sweet Paprika
8 Medium Sized Tomatoes, Diced
2 cups Vegetable Broth

In a large saucepan, heat the olive oil at medium heat. Add the onions and garlic, sauteeing them for a few minutes. Then, add the celery and potato. Stir everything together, and lower the heat to medium-low. Once the potatoes are softened, add the salt, oregano, rosemary, and sweet paprika. Stir in the tomatoes, and then the vegetable broth. Allow the soup to come to a boil, stirring occasionally, and then reduce the heat to low. Let it simmer for ten minutes, still stirring once in a while, until it has thickened. Then turn off the heat and pour it into the blender (feel free to do this in two or more steps if your blender is small - you do not want flying tomato soup!). If you want a chunkier soup, blend just a little, otherwise continue blending till you get your desired consistency. Pour the soup back into the pan or a prettier serving vessel, and ladle it out!

Note: This served five people for dinner, but if you were serving it as an appetizer it could probably serve at least eight.

Tuesday, March 29, 2011

Cooking With Katch Part I: Dinner


     Katch came back to the kitchen on Sunday! For those who don't know, Katch is a free-lance photographer (who has her own blog: http://katchiree.com/blog/). She came to take pictures for my blog once before when I made the blood orange olive oil cake and the coconut chicken curry. On Sunday, we went with the same theme: one curry and one dessert. Life is so easy when one is consistent! And that way I get one guilty pleasure and one staple meal for the week, so everyone's happy.


     I love cooking with Katch because someone else is taking pictures! Which means I don't have to wash my hands every five minutes in order to use the camera (I wonder if I told you that last time too, well, it makes me Really happy so I'm just emphasizing). Also, then the pictures come out looking beautiful and amazing. Even when they are of such unbeauteous things as mushrooms. Though, I do love mushrooms.


     While KK was visiting this weekend, she also bought these mangosteens. These are a fruit I had never heard of before. They taste kind of like sweet tarts inside, and they are very hard and tough to open unless you have a knife (as we found out while trying to eat them on the train home from H-Mart - where we bought them). I'm not sure I like the taste, but they are very interesting to look at, so I saved some for Katch to photograph:


     And then we actually started cooking. We made the dessert (to be displayed tomorrow) first, but I am posting the curry today (obviously). It is a fancier curry than normal, which also seems to be a theme when Katch is around. Why is it fancy? Because it has cashews! And a couple of extra spices I don't normally use. The difference a few ingredients makes astounds me.


     Look at the picture below, doesn't this look more like a restaurant curry? Slightly thicker, a little creamier, and all because of a little change in ingredients and technique. So, when you are in the mood to try something a little more upscale than my homey cooking, try out this curry! The ingredient list only looks long because I used more than the regular number of spaces. More importantly, this curry tastes just as gorgeous as it looks. The chicken is ridiculously tender, hurrah for chicken thighs, the cashews add a little crunch but melt away in one's mouth, and the curry itself is spicy and thick and full of the subtle flavors of all the different spices. It makes me want to go home and eat more right now.  If only.


Cashew Chicken Curry

4 large Chicken Thighs, De-skinned and De-boned
2 tbsp Vegetable Oil
1 mid-sized Yellow Onion, Finely Chopped
1 Garlic Clove, Minced
1/2 tsp Turmeric
1 tsp Coriander
1 tsp Garam Masala
3 Green Cardamom Pods
6 Black Peppercorns 
2 1/2 tbsp Plain Yogurt
1 tbsp Tomato Paste
1/3 cup Cashews, Finely Chopped (or Processed in a Food Processor or Grinder)
1 cup Cremini Mushrooms, Sliced
1 cup Water 
1/2 tbsp Lemon Juice

Chicken Prep: Trim the chicken thighs and cut them into 1'' cubes. While chopping onion, garlic, cashews, soak the pieces of chicken in a large bowl of water with a tablepoon of salt and a tablespoon of sugar until they are needed.

For the Curry: 

First, heat the oil in a large saucepan at medium heat. Add the pieces of chicken (do in more than one batch if adding all the chicken will crowd the pan) and cook the chicken on both sides, so each piece is sealed. Take the pieces of chicken out and place them in a bowl, setting aside for later. Return the pan to the heat, add more oil if necessary, and add the chopped onions and garlic, sauteeing until the onions are translucent and the garlic is slightly browned. Then, add the turmeric, coriander, and garam masala. After stirring and frying for a minute, add the peppercorns and cardamom pods. After allowing them to fry for two minutes, add the yogurt and tomato paste. Fry up while stirring constantly, allowing all the ingredients to combine thoroughly. Add the cashews and continue stirring until they are coated in the spice mixture. Add the mushrooms, the chicken, the cup of water, and the lemon juice. Stir everything together and let it cook at medium heat for five minutes. Then, reduce the heat to medium-low and allow it to simmer for ten minutes. The chicken and mushrooms should be tender and the curry should be fairly thick. If this is not the case, lower the heat and continue simmering for another five minutes.

Sunday, February 20, 2011

And We are Back to Earth

     It should not be allowed to be 65 degrees and summer one day and then snow the next night. The mood swings of the East Coast are wreaking havoc on my planning for each day. It continues to be on the cold side today, though without precipitation of any sort, and I suppose I must be happy with that. It is a day to be warm and inside, sit back, and enjoy my cookings. Make that, do my studying and work for the week ahead. Ah well. At least I can eat while studying. 
Lunch Time
     I knew Sunday would be like this: unmotivating and full of sorrow at the work I have to do. This is why I cheated. I cooked this dish on Friday night while making riblets! I am so full of forethought sometimes. It is a simple dish too, and a healthy dish. It made me feel better about adding all those honey to said riblets. It is cauliflower.  


     Cauliflower? Yes, cauliflower. It is really a very underrated vegetable. It is so easy to cook, so full of nutrients, and so....not bad for you - by which I mean, its hard to make it have a lot of calories. After a few days of picking at banana bread and cookies and the bag of Lindt chocolates sent to you by your mother, sometimes you need to start thinking about veggies again. 


     I was on the phone with my mom figuring out what to do with the riblets, when I decided I may as well give in and seek help on the giant cauliflower in my fridge as well. "Put it in the microwave," was the first thing told to me. "Cook it whole, don't cut it," was the second. Don't cut the cauliflower? But don't you have to pull it apart into all of its little stalks to cook it properly? Apparently not. 


     So, this recipe came from my mom's mouth to my ears to your eyes, as so often happens. It's simple, requires very little prep and few ingredients, and it is good. The cauliflower is soft and cooked through, but not mushy. It has a subtle spicy, tomato flavor, that would go great with other curries and rice. Its always good to have a dry vegetable around to offset meaty curries. Now, having made an entire cauliflower, I am also going to freeze a large portion of it (after the photography session is over), so I can have balanced servings of vegetables in my future. Huzzah. 

Cauliflower Mussalam 

Serves 2-4 depending on the size of your Cauliflower 

1 Cauliflower 
1 tbsp Vegetable Oil 
1 Medium Sized Yellow Onion, Finely Chopped
1 clove Garlic, Minced  
1/4 tsp Ginger Powder 
1/4 tsp Turmeric 
1/2 tsp Garam Masala 
1 tsp Ground Coriander
3 tbsp Tomato Paste 
1/4 cup Milk 

Cauliflower Prep: 

Cut the thick bottom stem of the cauliflower, but don't cut in so deep that the stalks become separated. Remove the leaves from the cauliflower, and rinse it under cold water. Place it in a microwavable bowl with a teaspoon of water in the bottom, and microwave it for 3-5 minutes depending on the strength of your microwave. You want the cauliflower to give a little, but not be squishy. 

Cooking the Cauliflower: 

In a large frying pan or wok, heat the vegetable oil at medium heat. Then, add the onion, garlic, and ginger powder. Stir and fry up until the onions are translucent. Next, mix in the turmeric, garam masala, and ground coriander. Fry for another minute, until all the spices are combined. Next, add the tomato paste. Stir constantly and fry for two minutes, until it has turned a darker color. Once the tomato paste is nicely fried, stir in the milk. Once that is all combined, place the cauliflower head down into the wok, so the stems are facing you. Baste it with the liquid base so that it is covered nicely. Then, lower the heat, and put a lid on the pan. Let it simmer for about 15 minutes, uncovering and basting the cauliflower once in a while. When the cauliflower is soft all over, it is done. Take it out of the pan and put it on a plate to cool slightly. Then, use a knife to cut the stem away, so all the florets fall off (it might be easier to cut the whole thing in half first and then do this twice, once for each side). Now, you have your cauliflower ready to serve! 

Note:

- Make sure you have a tight fitting lid because you want the steam to cook the cauliflowers that are not directly touching the bottom of the pan. 

- If your curry base becomes far far too thick to baste the cauliflower with, but your cauliflower is still not cooked, just pick up the cauliflower, stir a little milk into the base, and then stick your cauliflower back in. My base was pretty thick, but I just basted the cauliflower and allowed it all to soak into the cauliflower, so it worked out fine.

Thursday, February 10, 2011

Curries Make the World Go Round

Look at that steam!
     I hope you are thinking, Yay Curry! But, I would understand if, instead, you are thinking: another curry? But you just posted a curry! Well, to that I have to say: This blog is called Curries and Cakes, so I need to have curries plural! And, more relevantly, I ran out of said other curry, and I need food to eat and food to freeze for everyday non-blog living. Even though, I do wish I could live off of cakes and cookies. (Those Cocoa Cookies by the way....still soft and delicious...and addictive.) 

A full meal! (There is rice underneath, it is hiding.)
     This curry will also be different after all. It will be a full meal curry. It will have all my servings of meat and vegetables in one. So, when I need to be rushing off to work or class because I have just rushed in from work or class, all I have to do is make some rice, dump on said curry (and yogurt), and eat really really fast. To that end, this curry has in it: chicken, tomatoes, mushrooms, and baby spinach. I know my last curry was tomato-ey too, and the pizza had tomatoes on it, but do you see a trend? I bought tomatoes and tomato paste. Tomatoes must be finished before we can move onto other horizons. And, I used up most of the ones I had left in this recipe. Yay! Furthermore, this is a very different flavored curry from the last one. Hurrah for the power of different spices.

     I also just really wanted to have a curry with mushrooms. I love them. They are delicious, and soft, and delectable in curries because they soak up all the flavor. But before I get to the curry, did you know that you are not supposed to wash mushrooms? It ruins their flavor --- my mother and the Food Network told me. Instead, you take a damp paper towel or wash cloth, and you (gently) wipe of all the dirt off the top and underside of the mushroom. (I will not judge you if you still wash mushrooms, this is just what everyone would do in an ideal Mushroom Lovers World.) Also, aren't mushrooms just beautiful?

Beautiful mushrooms
     As a side note, you could easily make this curry vegetarian by just ignoring all the chicken steps. You also don't need to have the spinach. I actually just threw it in last minute because I realized I had some in the fridge. But, it does add a nice green note and make the curry even better for you. Also, if you don't own some of the spices, just omit them! If you only have garam masala, coriander, and turmeric, the curry will survive --- and still be more flavorful than most other foods. You do definitely need to own mushrooms. Still, I only bought one regular sized (8 oz) box of them the day I made this curry and then used them all up. So, I didn't even have to worry about excess mushrooms sitting waiting to be cooked in the fridge! Lastly, I used chicken thighs for this recipe. Even though I used breasts in the last curry, it was because I was in a hurry when I cooked it. ALWAYS use thighs when you can. You have to trim off the excess fat (don't obsessively trim off all the fat, like I used to do, because the point is to leave a little on), but they stay moist and extra tasty in curries. 

     This curry was again very easy to make and very flavorful. Its a little spicier than the last due to the black peppercorns and garam masala, which together add a bit of kick. It has the softness of the mushrooms and the spinach, the tanginess of tomatoes, plus the pungency of all the spices together. A very satisfying dinner, all in all.


Chicken and Mushroom Curry 

Makes 8 servings 

1 lb Skinless, Boneless Chicken Thighs
1 cup Button Mushrooms, Sliced
4 tbsp Vegetable Oil 
2 Black Peppercorns
2 Cardamom Pods 
1/4 tsp Turmeric 
1 Onion, finely chopped
1 tsp Ground Coriander
1/2 tsp Garam Masala 
1/4 tsp Ginger Powder 
1 clove Garlic, minced 
2 Tomatoes, diced 
1/2 tbsp Tomato Paste 
1/2 tsp Salt 
3/4 cup Water 
1/2 cup Baby Spinach 

Chicken Prep: Fill a large bowl with water. Add a tbsp of sugar and a tbsp of salt. Submerge chicken thighs while getting other ingredients together.

Cooking the Chicken

Cut the chicken thighs into 1 inch cubes. Heat 2 tbsp of oil in a large pan. Add the chicken and cook it on both sides to seal. Place the chicken in a bowl, and discard the oil. Set the chicken aside until needed.

Cooking the Curry: 

Heat 2 tbsp of vegetable oil in a large pan. Add the peppercorns, cardamom pods, and turmeric, and fry them for about 2 minutes at medium heat. Next, add the onions and fry them until they are translucent. Mix in the ground coriander, ginger powder, garam masala, and garlic, stirring while frying for 2 minutes. Then, add the tomatoes, tomato paste, water, and salt. Stir to mix thoroughly. Bring the mixture to a boil and then simmer for five minutes. Next, add the chicken and mushroom to the pan. Simmer on low heat for ten minutes, then stir in the spinach. Simmer for another five minutes, or until the curry is at the thickness that you want it. (Note: If you think the curry has gotten too thick for your liking, just add some water! The consistency should be what you want it to be.) 

Tuesday, February 8, 2011

A Curry!


     In honor of my friend OK, to whom I promised this and other curry recipes a long time ago, here is my first ever curry posting! I made this chicken curry a week ago actually and froze it. But having eaten it again for dinner a few days ago, I realized it is delicious. The recipe deserves to be posted. Furthermore, it illustrates my firm belief that Indian food is ridiculously easy to make. I mean, I'm not talking about naan or the other fancy foods that restaurant chefs spend hours preparing. I'm talking about the regular old, but still delicious and flavorful, Indian lentils, meat curries, and vegetables that I eat at home almost every day. Once you own some coriander, cumin, and red chili powder, you can really make any curry recipe! Even I don't own the more obscure spices here at school, but my curries are still my best meals. 

     This is one extra satisfying and simple chicken curry. It has a tomato paste base, a few spices, and some chicken breast. I was riffing off the "Chicken Madras" recipe in Mridula Baljekar's "Best-ever Curry Cookbook," since I didn't have my mother on hand to advise me on how much of each spice to add. The recipe called for fenugreek, fresh ginger, garlic, curry leaves and fresh green chillies. I did away with all of them or substituted with powders. Thankfully, it didn't harm the curry an iota (though I suppose it isn't traditional "Chicken Madras" anymore..ah well). Eating this curry with plain yogurt (yes, Indians eat curry with yogurt) and some defrosted mixed veggies (from where? from Trader Joe's!) I realized two things. First, that I hadn't eaten a full meal in days, and second: it tasted like home.

     I am going to do a more in-depth curry posting later, but as I do have a midterm tomorrow, I am going to cut this short. If you have never made curry before, start with this one! Its ridiculously easy, and it tastes delicious. The curry is lovely, tomato-ey, and not too spicy, but very flavorful (of course if you want spice, you can add back those fresh green chilies). And, the chicken prep is what my mom always does, so I do it too. Without further ado, here's the recipe:

Yay for a balanced meal! Also, this plate composing thing is far harder than it seems.

Chicken Madras 
(Loosely Adapted from Mridula Baljekar's Recipe in "Best-Ever Curry Cookbook") 

Serves 4

1 lb Chicken Breasts, Skinned
3 tbsp Tomato Paste 
1/4 tsp Fennel Seeds 
1/4 tsp Ginger Powder (or 1 tsp Fresh Root Ginger, Grated) 
1 1/2 tsp Ground Coriander 
1/4 tsp Garlic Powder (or 1 tsp Crushed Garlic) 
1/4 tsp Chili Powder 
1/4 tsp Turmeric 
2 tbsp Lemon Juice 
1 tsp Salt 
1 1/4 cups Water 
3 tbs Vegetable Oil 
2 Small Onions, Diced 

Prep for Chicken: Fill a large bowl with water. Add a tablespoon of sugar and a tablespoon of salt. Submerge chicken breasts while preparing curry base. 

Curry Base: 

In a medium bowl, mix the tomato paste, fennel seeds, ginger (whether powder or grated), ground coriander, garlic (ditto),  chili powder, turmeric, lemon juice, salt, and water.

Preparing Curry:

First, cut the chicken beasts into small cubes (about 1 inch). Heat the oil in a large pan, and fry the onions until translucent. Then, add the chicken and cook it on both sides to seal. Pour in the curry base and stir to make sure the ingredients are well mixed. Finally, lower the heat and simmer for 8-10 minutes.

Friday, February 4, 2011

Welcome!

A Sophomore in college, I've been reading food blogs while I should be paying attention to class for a good year now. There's nothing like pictures of freshly baked chocolate cakes or macaroons to make you forget the troubles of thermodynamics. Then, yesterday, I had an epiphany. I could write a blog myself! I was trudging home from the supermarket four blocks away, carrying two bags of groceries in each hand, my giant purse stuffed with two five-pound bags of flour and sugar respectively. Buzzing into my apartment, struggling with my keys, I finally felt like a twenty year old. I have my own apartment, I go buy my own groceries from far away-ish, carry them home, use them to cook. Wow. I feel like Julie from "Julie and Julia" (sadly, I've only seen the movie and haven't read the book or blog, so I'm comparing myself to Amy Adams' Julie here, not the real Julie - though I admire her a lot). And if she can write a blog, with all her meltdowns and her job, then I can create a blog with all my stress and school! So here it is.

Firstly, to introduce myself a little bit more: I'm Indian (hence the curries), and I love to bake (cakes!). I am pre-med, but I'm also an English major, so I do love to write. My family has moved rather a lot, so I've lived in England, Egypt, India, Boston, and am now in Philadelphia for school. Basically, this means I love all kinds of food and can't wait to get my hands on new foods and recipes all the time. Cooking is my therapy, my me-time at school. So, yesterday after all the trudging home with bags: I made pizza. Here's my first confession: I cheated. I used pre-made pizza dough from Trader Joes. In my defense: its only a dollar! Its delicious! And, I'll find you a good pizza dough recipe sometime soon, promise.


Its an ingredient party!

There was a reason for pizza making. I had the dough of course, but I also had a huge bag of onions. Unfortunately, these onions were from the grocery store across the street, which is not half as nice as the grocery store far away. I am scared for the longevity of these onions. Long story short, I had to cook them. So, I sauteed a ridiculous amount of onions (for me), used tomato sauce I had made the day before, chopped tomatoes, hard-boiled some eggs, cheese and hey presto! my pizza was born. Let me tell you, I really don't like onions. So the fact that I loved this pizza was pretty amazing. The crust was just crispy and chewy enough to offset the sweet, mushy, caramely onions and tomatoes, the egg added some necessary firmness, and the cheese was lovely, gooey and crisp by turns. A full and hearty meal all by itself for dinner and for lunches in the week of school to come!

I'm sorry about the lack of pictures by the way. I did take a bunch, and the realized my computer does not have a memory card reader! Will solve this problem for next time.


Look!!! I solved the problem! But, I did take pictures of leftover pizza, not pizza right when it was made. In its full glory, it was even more beautiful (and the cheese did not look so brown).


Onion and Tomato Pizza
Makes 9 servings

For the sauce: (will make about a cup)                
2 tbs Olive Oil  
1 Clove Garlic, minced 
1/2 Yellow Onion, chopped
1/4 cup Tomato Paste
3/4 cup Water
1 tbsp Sugar
1 tsp Salt
1 tbsp Ground Basil 
1 tsp Ground Oregano 
Black Pepper 

In a medium sized saucepan over medium heat, heat 2 tbs of olive oil. Add the minced garlic and chopped onion. Sauté them for a few minutes, until the onions are translucent. Stir in the tomato paste and the water until they are combined. Add the sugar, salt, and seasonings (the measurements are based on my taste - feel free to add more or less of anything, I like a lot of black pepper and basil, but just taste test). Bring to a boil, and then reduce to low heat, cover, and simmer for fifteen minutes.

For the Pizza: 
1 16 oz ball of Trader Joe's Pizza Dough
OR Enough pizza dough for a 12'' diameter thin-crust pizza
1/2 cup Tomato Sauce
3 tbsp Olive Oil plus extra for smearing on baking sheet
2 Mid-Sized Yellow Onions, Thinly Sliced
2 Plum Tomatoes, Sliced
4 Hard Boiled Eggs, Sliced
1/2 Cup Shredded Mozzarella Cheese 

Pre-heat your oven to 425 degrees. In a skillet over medium heat, heat 3 tbs of olive oil. Add the sliced onions and saute until they are slightly brown and very tender. Flour your work surface and roll your dough into a 12'' long, 8'' wide rectangle. Transfer to a baking sheet smeared with olive oil. Cover with tomato sauce, top with sliced tomatoes, onions, hard-boiled eggs, and cheese. Bake for about 20 minutes or until crust is golden brown.