Places to Go

Sunday, April 1, 2012

Star Struck


     I am a little star struck...or maybe a lot. Because what happened today was not just that Deb from Smittenkitchen responded to one of my comments on her blog...it was that I actually got to meet her! Isn't it funny how things you think are impossible can sometimes come true? How it helps you realize that if little things you thought could never happen can happen, then maybe those big impossible things looming ahead will happen too.


     Life is full of surprises and little blessings. Today I went to hear Deb talk on a panel, and I got to talk to her afterwards. And she is so sweet and so nice that she didn't even mind when we crazy star struck college girls mobbed her after the talk. Instead, she responded to all our questions! And talking to her and hearing her talk about her blog, I realized what a lovely thing a blog can be. Not just in that it can get one cookbook deals or panel invitations, but because it brings so many people together. Two girls I work with were at the talk today, and we got to discuss something non-work related! One person's writing did that for us.


     And not just one person's writing, but one person's cooking. Making food is such a communal experience. I feel like even if you are cooking for one, the process of buying the food from somewhere, transporting it, picking a recipe from cookbooks or blogs - everything turns it into a social experience. Listening to Deb talk about how she is constantly thinking critically about how food can be improved reminded me of how much food can mean. It can mean sharing, it can mean thinking critically and analyzing, it can mean traveling or scavenging to find ingredients (generally the latter if you're me).


     All this inspired me again, to create my own recipe. I love adapting recipes, and I often don't have the time to tweak them and give them my own spin as much as I would like. But Deb's idea of thinking of things You want to eat and then going on to create those really struck me. Enough that as soon as I got home, I made this flatbread. I love goat cheese, I love peaches, and in my mind they sing together. My go-to Trader Joe's crust stretched thin topped with drizzles of honey, peaches, goat cheese, a little black pepper and basil was thus born. I can imagine this as a lovely summer treat, when there are real peaches and not the frozen ones I have. Crispy and light and refreshing but with the melting creaminess of warm goat cheese, it was the perfect lunch (maybe not my most balanced meal...but that's OK). And above all, it reminded me of what I can do and come up with, and what blogging and being here lets me do. So thank you.


Peach and Goat Cheese Flatbread

1/2 Trader Joe's Pizza Dough (or enough dough for an 8'' Diameter Thin Crust Pizza)
1/2 Cup Sliced Peaches (I defrosted sliced, frozen peaches - I'm sure fresh would be better)
1 tsp Olive Oil
2 tsp Honey (You could use less if you have really sweet peaches)
3 tbsp Goat Cheese
1/4 tsp Black Pepper (This is to taste: just a few grinds is what you want)
1/4 tsp Basil (Ditto)

Pre-heat the oven to 425 degrees F. Drizzle a little olive oil on an 8'' by 10'' baking tray and stretch or roll out your pizza dough until it covers the pan, i.e. it is as thin as possible without tearing (or roll it into an 8'' diameter pizza and use a pizza stone). Next, slice your peaches thinly. If you use pre-sliced peaches like me, just slice them each in half again lengthwise. Drizzle your pizza dough with a little bit of olive oil and 1 tsp of honey, making sure to cover the whole surface. Lay your slices of peach out on the dough trying not to overlap them. Then, put the tray in the oven and let it bake for 10 minutes until the crust is golden and crispy. Take the tray out and dollop the goat cheese all over the flatbread and around the peach slices. Place it back into the oven for 2 minutes, and then take out. Sprinkle it with black pepper and basil, and drizzle the remaining teaspoon of honey all over. Let it cool on the tray for 5 minutes, put it onto a cutting board, and serve!

Monday, March 19, 2012

Spring Time!


     Good God, has it actually been a month? I missed all you lovely people. I missed cooking and I missed photographing, but most of all I missed writing. Writing English essays is one thing, writing endless reactions over and over again (organic chemistry anyone?) is something entirely different, but writing these blog posts keeps me sane. Oh the joy of writing what I Want to write! Of spilling out what I really and truly feel. Thank you for being here to read my ramblings, thank you oh so much.


     And here with my ramblings I am back to present...another cake! I seem to be on some kind of cake-roll, but when I am stressed beyond belief, cake is my savior. Cake makes me happy, baking cake gives me an opportunity to blast music and sing and run around the kitchen while its in the oven...and end up with such a delicious product! I know its not the healthiest option, but my sweet tooth will never understand.


     This cake is also so seasonal. The sun is shining almost too brightly, I'm wearing a skirt and a tank top, and I bought a whole pineapple from Trader Joe's on Friday! I have never bought a pineapple before. I'm not sure if or when I've even eaten fresh pineapple before. Let me tell you, I was intimidated when it came down to cutting and peeling and coring this thing, but thankfully I just followed Deb at Smittenkitchen's step by step pictures.


     I also came up with this cake recipe (almost) all by myself! I based most of the ratios off of Deb's recipe but the effect is entirely different. Oh my this cake was so good. I wanted something light, something I could eat for breakfast and with tea, after lunch and after dinner, and never get tired of. Boy, did I succeed. (Did I really just say Boy? Writing again makes me overly euphoric..) Bursting with pineapple chunks, moist beyond belief, and just barely sweet, this cake keeps you coming back for more and more and more. Just like writing is going to bring me back again so soon!

 
    Happy Spring time!


Pineapple Chunk Cake
Very loosely adapted from Smittenkitchen

1 Medium Pineapple
1 1/2 cups Water
3/4 cup Granulated Sugar
2 tbsp Rum (I had light, but I bet dark would be good)
2 cups All-Purpose Flour
1 tsp Baking Powder
3/4 tsp Baking Soda
1/2 tsp Salt
1 stick Unsalted Butter (or Margarine)
2 Large Eggs

First, cut off the top of the pineapple and quarter it lengthwise. Then, core it by cutting out the middle section, and peel off the skin making sure no knobs are remaining. I then cut the pineapple quarters lengthwise in half again, and just chopped those up. If you would like smaller chunks of pineapple in your cake, dice more finely, it is up to you!

In a large saucepan, heat the water, 1/4 cup of the sugar, and the rum at medium heat. Once it is boiling, stir to make sure all the sugar is dissolved. Then, add in your pineapple chunks. Reduce the heat to medium low, and allow the pineapples to simmer in the syrup for 15 minutes. Then, turn off the heat and transfer the pineapple chunks to one bowl and the syrup to another. Let them cool.

Meanwhile, pre-heat the oven to 350 degrees and butter a 9-in cake pan. In a medium bowl, whisk together the flour, baking soda, baking powder, and salt. In another large bowl, cream together the butter (softened first in the microwave) and the remaining 1/2 cup of sugar. Add to this one egg at a time, beating thoroughly after each addition. Next, stir in 1/2 cup of the syrup, then fold in 1/2 of the flour mixture. Repeat this once more so you have incorporated 1 cup of syrup total, stirring just until everything is incorporated. Last of all, fold the drained pineapple chunks into the batter (the remaining syrup will be used as a glaze). Bake the cake for 35-40 minutes or until a toothpick stuck into the middle comes out clean. Take it out and allow it to cool in the pan on a wire rack for 10 minutes. Then, turn it out onto the rack. Place a large plate or cutting board under the rack, and pour the remaining (I know its super watery) syrup carefully all over the cake - you want as much to soak in as possible. Once that is done...try to wait for it to cool at least 5 minutes longer. Then eat! Or let it cool all the way if you can.

Wednesday, February 22, 2012

Banana-Zucchini Bread


     Today, I decided to do the laundry. I decided to wash all my sheets and all my towels. I decided to reorganize my closet. I have piled up all the dishes, and I will do them All. Because my parents are visiting. Not just my parents, but my parents and my little brother. (My little sister having decided to go to school on the West Coast she cannot join the reunion, but I will see her soon so all is well.)


     Struggling to get my comforter back into its newly washed duvet cover a little while ago, I felt a strange kind of vertigo. My family is visiting so I'm cleaning my apartment. Wasn't it just yesterday that I was sitting on the couch folding the laundry with my mom? That I was complaining about the sandwiches she'd made me to take to school? That I could come home and there would be fresh baked bread stored, as always, in the slow cooker? Yes, I get it back for a little while over vacation. But is this, this living in an apartment and making my own meals and folding my own little store of laundry, is this real life now?


     If it is, its a good thing my parents are visiting. I want to be pampered for a little while. I don't want to cook my own meals. I want to be driven around in the car, in the back seat with my little brother. One of my very wise friends the other day commented on our lives at college, how we are constantly running around. No two hours are spent in the same place between different classes and meetings and studying. Its true, and now I need a respite, a little haven. And that is what parents are for, right?


     Just like this bread. I know I gravitate towards banana bread and zucchini bread, so it seems inevitable that a banana-zucchini bread is making its way onto my page. But, when one has half a zucchini in the fridge and wants comforting food, this does seem the way to go. This bread is dense and moist, full of banana flavor and the heartwarming knowledge that one is eating a vegetable. But most importantly, with its cinnamon and nutmeg goodness, this bread made my apartment smell like home. A home my parents and brother can come visit and fill full of home-like memories.

Banana Zucchini Bread
Adapted from Joy the Baker

2 large Ripe Bananas
3/4 cup Granulated Sugar
1/4 cup Vegetable Oil
2 tsp Vanilla
1/4 cup Milk (or use Soy Milk to stay vegan)
2 cups All-Purpose Flour
1 tsp Baking Soda
1/2 tsp Salt
1 tsp Cinnamon
1/8 tsp Nutmeg
1 cup Shredded Zucchini

Pre-heat oven to 350 degrees and grease an 8 by 4 (or 9 by 5) loaf pan.

In a large mixing bowl, whisk together the flour, baking soda, cinnamon, nutmeg, and salt, and set aside. Next, in a separate mixing bowl, thoroughly mash your bananas. To your bananas, add the sugar, oil, vanilla extract, and milk. Whisk everything together until incorporated. Using a wooden spoon, mix these wet ingredients into your dry ones until just combined. Fold in your shredded zucchini, and scrape the batter into the loaf pan. Bake for 45-50 minutes, testing with a toothpick to make sure it comes out clean and the bread is ready. Once it is done, take it out on the oven and cool it on a wire rack for ten minutes in the pan. Then, upturn the cake onto the pan, and leave it to cool completely - or slice and eat right away.

Friday, February 17, 2012

Returning to My Roots


     Sometimes, you have to work with what you have. That sometimes is pretty much all the time regarding cooking and me lately. I need to start shopping based on things I want to make. Instead I shop like this: I need a fruit (bananas), I need a cheese (this takes the longest), I need 2 vegetables (mushrooms!...and something random), I need 2 frozen foods because I know I will not cook once I get home from Trader Joe's after starving all day today, bread, sandwich meat...and there we have the constants of my ten things I buy every week (I leave room for a little miscellaneous..eggs? pasta? what don't I have at home? Toothpaste. You know, that kind of thing).


     The issue with this grand new shopping system is that while I have the ingredients needed to throw together my everyday meals (there's been a lot of omelettes lately), I never seem to have the right things for a Recipe. But then I had a revelation. Isn't that what I used to blog about when I blogged everyday oh so long ago? I just used to write about my everyday meals because isn't that The Point. That everyday meals can be made in college, that they can be super simple and not require a Recipe? No more capitals in the middle of sentences from now on, promise.


     Here's another revelation. I totally missed my one year anniversary of blogging. I feel like I don't deserve it anyway due to my winter break hiatus... But this is my 100th post. Wow. You know, I constantly contemplated my 100th post, and how I would make something super fancy and super special. But in a way, this is much more fitting. Here am I, college student with fridge full of my 10 weekly items, telling you that a little thinking out of the box and scrounging around your apartment is all you really need to make a special meal just for any old weeknight.


     So, here's what I actually made: mushrooms (obviously) and pasta. Simple. But no jars of tomato sauce because just because we are in college doesn't mean we can't make sauce! It doesn't take that long, I promise. Here's what it took me: I chopped up mushrooms, I cooked the mushrooms, I took them out and used the same pan to cook down some red wine, chicken broth, and spices. I added my pre-cooked pasta (which I cooked to just al-dente) and my mushrooms, and simmered everything together. Grand total: 20 mins. Use what you have on hand! Google recipes and find new ideas! But keep cooking, and your everyday meals won't seem everyday anymore, they will be 100th post worthy.


Red Wine and Mushroom Pasta

Note: Feel free to use any seasonings you like. Thyme, oregano all go well with basil, or as substitutes. Red chili flakes are of course optional, but they don't add a lot of heat to this just a little flavor. Also, I used the honey because my wine was Super acidic and I really didn't like its taste that much, so honey is a good...rounder-outer of the flavor. Use your taste buds to guide you! Also, use spaghetti or any other long/strand pasta you like, I just do think the long-strand types would work better than other kinds.

1 tsp Crushed Garlic (or 1 Garlic Clove, minced) 
2 tbsp Olive Oil 
10 oz Baby Bella Cremini Mushrooms (or really, any kind of mushrooms you like)
1/2 tsp Salt
1 tsp Dried Basil
1 tsp Italian Seasonings
1/2 tsp Red Chili Flakes
1/2 cup Red Wine
1/2 cup Chicken OR Vegetable Broth (Or 1/2 cup Water and 1/2 bouillon cube) 
1/2 tsp Honey
2 servings Linguine, Just-Cooked (i.e. take them out when they are still rather al-dente)

     Roughly chop your mushrooms, including the stems. In a very large frying pan, heat 1 1/2 tbsp of olive oil at medium high heat. Once it is hot, and 1/2 tsp of the crushed garlic, and allow it to sizzle for a minute. Then, add in the mushrooms and salt. Stir them around well, and then let them sit evenly on the pan and cook for 3-4 minutes, only stirring occasionally. Once they are darker and tender, and releasing some juices, transfer the mushrooms into a separate bowl. Try to the get the juices to stay in the pan.

     Add the remaining 1/2 tbsp of olive oil, and the remaining 1/2 tsp of the garlic to the same pan at medium-high heat. Allow them to sizzle for a minute, then stir in the basil, Italian seasoning, and red chili flakes if using. Stir in the pan for a minute or two, then add the wine and broth (or water and cube). Mix everything together well, adding the honey if needed, and then leave for 5 minutes. Allow the alcohol to evaporate off and the sauce to become thicker. Once it looks slightly (not A lot, just slightly) more viscous, add in the just-cooked pasta. Stir the pasta into the sauce, it will absorb the color and should start absorbing the flavors. Leave at a simmer for a few minutes, until the sauce has reduced further and most of it seems absorbed into the pasta, and then add the mushrooms. Simmer everything together for a few minutes until the mushrooms are hot again, and serve!

Sunday, February 5, 2012

Happy House


     It's been awhile.... A long while. There's the usual run of excuses to give - I had winter break! Then I came back! School started! And the more realistic - I was so exhausted when I got home I barely cooked. I was so overwhelmed when I got back to school that blogging seemed like a chore. Thankfully, I have put that all behind me - courtesy dropping a class and realizing No, there are not 30 hours in a day.


     Everything is settling down. Philly is looking beautiful again, and my stove ridiculously inviting. But not as inviting as my oven. I know that the last thing I posted - oh so long ago - was a cake, but I couldn't resist. I want to celebrate being back. This is my little internet home, and I wanted a little homey cake to go with what I can't help but consider my (hopefully permanent) return.


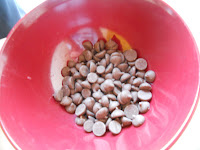
     I actually had no idea what kind of cake to make once I started thinking about blogging again, but there I was helped out by my little sister in the Big Brother Big Sister type program that I'm in. This week when I saw her, she really wanted to make a vanilla cake. And when we went grocery shopping, it was entirely her idea to buy a bag of Hershey's Mini Kisses. Inspiration comes from all sorts of places, and it was a good thing she was around because this cake would not have been half as amazing without her.


    So, we worked busily and produced this giant of a cake. Can't you just tell that it made the apartment smell heavenly? Golden crumbed on the outside, almost like cornbread as my assistant said, and densely vanilla-y inside with little chocolate chunks, it might have been lovely on its own. But we didn't stop there. I made a thick chocolate cream cheese filling and chopped almonds into it. Cutting the cake in half (Not very expertly...) and filling it was fun, eating it was so much more.


     I took it to a potluck at my friend's place, a house aptly named Happy House, and there it was happily devoured. That was really all I needed to blog again. I love cooking and I missed it....but more than that sharing my food and hearing how much people liked it reminded me that what I love most about blogging is sharing with all of you, and the thought that maybe someday you can share these foods with others. I hope you make this cake and it makes you as happy as it made me! It's good to be back.


Happy House Cake

For the Chocolate Chip Cake:
Adapted from Smitten Kitchen

4 cups All-Purpose Flour
2 tsp Baking Powder
1 1/2 tsp Baking Soda
1 tsp Salt
1 cup Softened Butter (I use Smart Balance...just to make myself feel better)
1 3/4 cup Sugar
2 tsp Vanilla
4 large Eggs
2 cups Milk
4 oz Mini Hershey's Kisses (or chocolate of your choice) 

Pre-heat the oven to 350 degrees. Butter a 9 by 13 pan and line the bottom with parchment paper (or you can use two 9 in cake pans if you want to make a layered cake), make sure to butter on top of the parchment as well. 

In a medium bowl, whisk together the flour, baking powder, baking soda, and salt. In a separate large bowl, use an electric mixer to beat together the butter and sugar until it is fluffy and a lighter cream color. Next, beat in the vanilla, and the eggs one at a time. Make sure everything is well mixed. Then slowly pour in the milk while beating at low speed. Your mixture is going to look supremely curdled. Once the milk is combined, add the flour mixture in three batches. Use the mixer on low to mix in each addition until it is just incorporated, no need to overmix. Pour your batter into your cake pan and spread it evenly. Lift your pan up an inch off the table and drop it down to pop any air bubbles. Then, place it in the oven for 45-50 minutes until its golden brown. While it is baking, start on the frosting.

Start checking the cake at 40 minutes but it might take slightly longer to bake. It is ready when you can insert a toothpick in it and it comes out clean. Place it on a wire rack once done, and let it cool in the pan for 10 minutes. Once it has cooled, run a plastic knife around the edges and upturn it onto the rack (if you have one that large). I just let mine finish cooling on a large cutting board.

For the Filling:

6 oz Mini Hershey's Kisses
1 tbsp Butter
1/4 cup Milk
5 tbsp Cream Cheese
1/3 cup Almonds, Finely chopped

Place the chocolate and butter in a small saucepan at medium heat. Mixing with a wooden spoon, let all the chocolate melt. Once it is melted, whisk in a couple of tablespoons of the milk. Next, whisk in the cream cheese (Note: if you would like, you can pre-whisk the cream cheese in another bowl or with an electric mixer so it is fluffy and you don't have to work so hard whisking it in by hand into the chocolate). Once the cream cheese is thoroughly incorporated, it is up to you. I wanted a fairly thick filling, but one that would easily spread through the cake and have vaguely the consistency of a pudding. So I whisked in slightly less than 1/4 cup of milk, and kept whisking and cooking it until it reached that. If you like a slightly thinner, more ganache like filling just add more milk. Once your filling is ready, whisk in the almonds.

To put the Cake together

Once the cake has cooled completely, place it on a cutting board and make sure you have another large cutting board or plate nearby. Use a long serrated knife to divide the cake into two layers. For me, this is easiest to do just going around all four edges, making sure the knife goes in as far as possible so you cut the middle in half as well. Carefully lift off the top and place it on your other cutting board or plate. Using a large spoon or spatula, dollop your filling out onto the cake. Use your utensil to evenly coat the entire cake. Once that is done and all your filling is used up, place the top of your cake back into place. Now cut a slice and eat!