Places to Go

Thursday, March 31, 2011

Resourcefulness

     This week I discovered something. I discovered that in growing up, I have grown resourceful. Things don't faze me as much anymore. And no, I am not just saying this. And yes, I know what happened isn't actually that fazing or that big a deal, but it made me happy so I'm going to go with it. And now you will have to hear about it.

Loaf pan= Trash can bowl (just clarifying)
     So, what happened? Well, people came over for dinner. I love having people over for dinner. I love sharing food with people who are not just me and my freezer (and since he is just holding food for me for later, he doesn't even count - sorry Mr. Freezer). I was expecting PVL and DL (who is visiting from New Zealand for a few weeks, I cannot believe I have not mentioned him! He's the greatest. Anyway...) but I also got BJG. Now, everyone knows that BJG is my friend. He is just also...cough cough...a Vegetarian.

Look! Its BJG! Big Jogging Giant....will work on it
     Well, I was planning to feed everybody the cashew chicken curry I had made with Katch (this was Sunday, I'm so backed up with recipes! It's ok, i'll catch up soon). But, what would I feed BJG? Poor thing, he brought a thing of noodles to eat in case I did not have food for him. As though I would let anyone heat up noodles to eat in my house. Tsk tsk.

TOFU!
     Luckily, my fridge is now well stocked - courtesy Reading Terminal and H-Mart trips with KK over the weekend. So, I had: tofu, zucchini, and carrots. All the fixings for a veggie dish. Chop up tofu, zucchini, and carrots. Heat up oil. Hmmm...at this point there are two options: try to figure out how to season this from scratch, or use sauce courtesy H-Mart. So, I cheated. And now I'm blogging about it. Is that OK? Well, I am blogging about cooking in my college life. And sometimes, that involves cheating and the use of pre-made products. I'm okay with that once in a while.
People over for dinner = Rushed picture taking
     So, I used the sweet and spicy pork marinade I had bought from H-Mart. It has apples and pears in it! It is vegetarian, I checked. It's also amazingly delicious. If you are at any Asian grocery store, you should look for these kinds of Korean BBQ Marinades, especially the kinds for kalbi. They make everything so flavorful. So, I cooked up the veggies and tofu with a couple of tablespoons of marinade, and voila! I had food for the vegetarian. I am un-faze-able.

P.S. I am also on the bus to Boston because I'm going home for the weekend! I love buses with wi-fi.

Vegetable Tofu Stir-Fry 

1 tbsp Vegetable Oil 
2 mid-sized Carrots, Sliced (not too thin) 
1/2 Large Zucchini, Chopped into Quarter Circles  
A dash of Salt
1/2 tbsp Water
1/2 block Soft Tofu, Cut into 1 in cubes 
2 tbsp Korean Kalbi Marinade (or other sweet-spicy marinade sauce)  

Heat the vegetable oil in a large skillet or saucepan (all I have). Add the carrots and zucchini and salt. Stir them around, and then add the water. Allow them to cook until the zucchini looks Slightly more translucent. Then, add the soft tofu and allow it to cook for a couple of minutes. Lastly, add the marinade. Stir everything together, and allow it to cook until the zucchini is translucent looking and the carrots are softer (cook for less time if you like crunchy carrots, and longer if you like squishy carrots).

Serve on top of rice!

Wednesday, March 30, 2011

Cooking With Katch Part II: Dessert


     I love dessert. I eat dessert by pounds and handfuls and open-mouthed-mouthfuls. I love sweet things. It is not surprising that the dessert I made with Katch was completely gone by the day after she took these pictures. Only these memories stay behind. I will have to make these bars again soon. And this time, there won't be so many mistakes. But let me not get ahead of myself.


     Hi everyone! Welcome back to the Cooking with Katch feature, which I hope will become more regular. Please, feast your eyes on one day more of gorgeous pictures before we go back to me cooking at night and trying to take pictures while stirring things in pots. I'm trying to improve I promise, but I love how these pictures make the food look like it should look. I was actually really sad because I though that the food I was making would not be colorful enough for Katch to make it look pretty, but she managed to, of course.


     Wait, you ask, so what exactly is this food? It looks like lemon bars, why is there a jar of white flower petal looking things? Well, those are actually pieces of coconut. (I think they look like flower petals even if you don't...) And what I made is coconut lemon bars. The cookie dough-like crust which I am spreading out on the pan has coconut in it, which adds a delicious new flavor to a regular lemon bar.

Look it's Katch!
     The coconut lemon bars were actually quite a mess to make. I was all out of sorts because KK had just left after visiting for the weekend, and I had not organized what I was cooking. It's a good thing we went to H-Mart and I bought many lemons, because I am a miser and they were selling three huge lemons for 90 cents or something like that. KK also gave me half her jar of dried coconut, so, of course I had to cook with it right away. So what did I do? I googled coconut and lemon, and this is what I found. What could be better? Who doesn't like lemon bars? If you don't, I'm not sure if I trust you anymore...


     The other reason making these was a mess was entirely my fault. The recipe I was making the bars from used an 8 in square pan. Of course, I don't own any such thing. So, I decided to spread the dough on half of my baking sheet and use that apparatus of foil-and-loaf pan (that you can just catch a glimpse of on the right side of that picture) to make my baking sheet smaller. Of course it didn't work. Of course some of the filling dripped onto that other half of the pan. And, of course I had spread the dough further than 8 in square so the filling ended up being a lot more spread out and thin than it was supposed to be. But did it matter?


      Well, maybe in the beauty category. We worked hard to make these bars look good. Or, I tried my best to cut neat squares of them out of the pan and then Katch beautified them. But in the taste category? Even with the filling being thin, they were delicious. The coconut cookie crust underneath was not too sweet but it complimented the bright, tangy lemon beautifully. 

Do you see the filling?
     I strongly recommend making these at home (in a proper pan). They were all disappeared within 24 hours of their creation even with my mistakes. Next time, I plan on doubling the recipe and just making a baking-sheet-ful. Oh lemon bars, you are just too delicious.


Coconut Lemon Bars
Adapted from For the Love of Cooking

For the Crust: 

1 cup Flour
1/2 cup Confectioner's Sugar 
1/2 tsp Sugar 
1/8 tsp Salt 
1/2 cup Shredded Coconut (or large Coconut pieces like I had which you then have to chop up) 
8 tbsp Margarine (or 1 stick butter cut into small pieces) 
1/2 tsp Vanilla

Pre-heat the oven to 350 degrees and heavily butter an 8'' baking pan. In a large bowl, stir the cup of flour, both kinds of sugar, and salt together. Add the butter, vanilla, and coconut, mixing everything together with your hands until it is crumbly and dough-like. Press the dough into the bottom of the pan, making sure it is evenly spread. Bake it in the oven for 18-20 minutes until it is slightly golden. Then, set it aside.

Note: I added regular sugar to the dough because my coconut was not sweetened. If you buy sweetened coconut, nix that extra 1/2 tsp.

For the Filling: 

2 Large Eggs 
1 cup Granulated Sugar
2 tbsp Flour 
1/8 tsp Salt
Zest of 1 Lemon (about 2 tsp) 
1/3 cup Lemon Juice (juice of 2 lemons for me)

Make sure your oven is still heated to 350 degrees (in case you turned it off). In a medium bowl, whisk the eggs, sugar, flour, and salt together. Then, add the lemon zest and lemon juice. Mix everything until it is thoroughly combined. Pour the filling over the hot crust, and bake it for 15-18 minutes until the filling sets and looks more firm. Take it out of the oven and allow it to cool on a wire rack for 10 mins. Then, cut it into squares to serve. You can top it with shredded coconut for serving.

Tuesday, March 29, 2011

Cooking With Katch Part I: Dinner


     Katch came back to the kitchen on Sunday! For those who don't know, Katch is a free-lance photographer (who has her own blog: http://katchiree.com/blog/). She came to take pictures for my blog once before when I made the blood orange olive oil cake and the coconut chicken curry. On Sunday, we went with the same theme: one curry and one dessert. Life is so easy when one is consistent! And that way I get one guilty pleasure and one staple meal for the week, so everyone's happy.


     I love cooking with Katch because someone else is taking pictures! Which means I don't have to wash my hands every five minutes in order to use the camera (I wonder if I told you that last time too, well, it makes me Really happy so I'm just emphasizing). Also, then the pictures come out looking beautiful and amazing. Even when they are of such unbeauteous things as mushrooms. Though, I do love mushrooms.


     While KK was visiting this weekend, she also bought these mangosteens. These are a fruit I had never heard of before. They taste kind of like sweet tarts inside, and they are very hard and tough to open unless you have a knife (as we found out while trying to eat them on the train home from H-Mart - where we bought them). I'm not sure I like the taste, but they are very interesting to look at, so I saved some for Katch to photograph:


     And then we actually started cooking. We made the dessert (to be displayed tomorrow) first, but I am posting the curry today (obviously). It is a fancier curry than normal, which also seems to be a theme when Katch is around. Why is it fancy? Because it has cashews! And a couple of extra spices I don't normally use. The difference a few ingredients makes astounds me.


     Look at the picture below, doesn't this look more like a restaurant curry? Slightly thicker, a little creamier, and all because of a little change in ingredients and technique. So, when you are in the mood to try something a little more upscale than my homey cooking, try out this curry! The ingredient list only looks long because I used more than the regular number of spaces. More importantly, this curry tastes just as gorgeous as it looks. The chicken is ridiculously tender, hurrah for chicken thighs, the cashews add a little crunch but melt away in one's mouth, and the curry itself is spicy and thick and full of the subtle flavors of all the different spices. It makes me want to go home and eat more right now.  If only.


Cashew Chicken Curry

4 large Chicken Thighs, De-skinned and De-boned
2 tbsp Vegetable Oil
1 mid-sized Yellow Onion, Finely Chopped
1 Garlic Clove, Minced
1/2 tsp Turmeric
1 tsp Coriander
1 tsp Garam Masala
3 Green Cardamom Pods
6 Black Peppercorns 
2 1/2 tbsp Plain Yogurt
1 tbsp Tomato Paste
1/3 cup Cashews, Finely Chopped (or Processed in a Food Processor or Grinder)
1 cup Cremini Mushrooms, Sliced
1 cup Water 
1/2 tbsp Lemon Juice

Chicken Prep: Trim the chicken thighs and cut them into 1'' cubes. While chopping onion, garlic, cashews, soak the pieces of chicken in a large bowl of water with a tablepoon of salt and a tablespoon of sugar until they are needed.

For the Curry: 

First, heat the oil in a large saucepan at medium heat. Add the pieces of chicken (do in more than one batch if adding all the chicken will crowd the pan) and cook the chicken on both sides, so each piece is sealed. Take the pieces of chicken out and place them in a bowl, setting aside for later. Return the pan to the heat, add more oil if necessary, and add the chopped onions and garlic, sauteeing until the onions are translucent and the garlic is slightly browned. Then, add the turmeric, coriander, and garam masala. After stirring and frying for a minute, add the peppercorns and cardamom pods. After allowing them to fry for two minutes, add the yogurt and tomato paste. Fry up while stirring constantly, allowing all the ingredients to combine thoroughly. Add the cashews and continue stirring until they are coated in the spice mixture. Add the mushrooms, the chicken, the cup of water, and the lemon juice. Stir everything together and let it cook at medium heat for five minutes. Then, reduce the heat to medium-low and allow it to simmer for ten minutes. The chicken and mushrooms should be tender and the curry should be fairly thick. If this is not the case, lower the heat and continue simmering for another five minutes.

Monday, March 28, 2011

The Best Way to Start a Day


     I love french toast. I know you might have already guessed this considering that a significant portion of both my challah bread and brioche went to french-toast making. But, I want you to know that when you wake up and you can fry up some french toast, you start your day in a very very good way. And, it is actually a filling breakfast, which is very important when you decide to walk the forty blocks to downtown Philly with nothing else in your tummy.

Bread! courtesy Trader Joe's
     Are you seriously giving a recipe for french toast? You might ask. Yes, I know it is simple. But, on the other hand, a lot of people I know seem to eat the same thing for breakfast every day: cereal. And making other things (pancakes for example) seems like a large undertaking. Making pancakes is a little fussy sometimes, but look at this lovely breakfast alternative! Hurrah for the french toast.


     I did try to gussy up my french toast a little. For those of you who don't know, I really don't like maple syrup. Yes, I know I am a freak. It is also astonishing considering that I add sugar by the tablespoon-full to my tea and I can eat desserts by the pound that maple syrup seems too sweet to me. Wonders never cease. Anyway, point being, I do not own maple syrup to put on French toast. So, I made a little honey-strawberry sauce. It is amazing how doing a mind-numbingly simple thing like adding strawberry jam to honey can yield something so delicious.


     So, me and my friend KK, who visited for the weekend, gobbled up french toast in the morning before setting out to town (two hours later because we ended up watching a lot of Modern Family online....I love that show). Walking to Reading Terminal (on 11th St) from University City where I live may seem like a lot of trouble to you, but there are such beautiful things along the way!

Town Hall: Picture taken while walking
And, when you walk that much, you can never feel bad about grabbing a few snacks. Especially delicious Sundae Flavored Coconut Strips.

Coconut Strip from Di Bruno's
French Toast with Strawberry Honey Sauce

For the French Toast

2 Large Pieces Crusty White Bread (I used Tuscan Pane from Trader Joe's)
3 Eggs, Beaten
2 tbsp Milk
1 tbsp Sugar
1/2 tsp Vanilla
1/4 tsp Cinnamon
Pat of Butter 

In a large, flat container (I use a large tupperware), stir together the eggs, milk, sugar, vanilla, and cinnamon. Lay the pieces of bread inside, turning them so each piece is coated (if they are not all submerged in liquid). Allow them to soak for 15-30 mins, turning them periodically so each piece is evenly soaking. In a frying pan at medium heat, melt the better. Lay one piece of french toast, allowing it to cook until the edges are browned and then flipping it to cook on the other side (about 2-3 mins both sides). Repeat for the other piece of french toast.

Note: My pieces of bread broke in two, so I made four pieces of french toast two at a time. Don't let crumbly bread get you down!

For the Strawberry Honey Sauce

1 tbsp Honey
1 tbsp Strawberry Jam
A Dash of Black Pepper

In a small bowl, mix together the honey, strawberry jam, and then sprinkle on the pepper. Yes, that's it. Top the french toast with it and serve! 

Saturday, March 26, 2011

A Midnight Snack

A Piece of Goodness

     Though, to clarify, this wasn't supposed to be a midnight snack. It was supposed to be a dessert that would last through at least one meal. It did not. It came out of the oven at 12:30 am and there was only one measly piece left by 1 am. That measly piece disappeared the next morning. No prizes for guessing who ate it. Actually, I shared it with my friend KK who is visiting (and no those are not her real initials for those who know her, but those are the initials correlating to what I call her, so those are the initials you will come to know and love - sorry for the convolutedness, everybody else).


     So, what is this short-lived food? It is Chocolate Bread Pudding. And before you roll your eyes and wonder why I am making another bread pudding, let me tell you that there is a poor loaf of Trader Joe's bread that has gone kind of stale in my fridge. What else would you have me do with it?

     Wonder of wonders, this bread pudding created a niche for itself outside the other ones I have made so far. Both the cinnamon bun and the peanut butter and jelly bread puddings were delicious, but they were rather heavy. They were more dense desserts, to be enjoyed in small pieces at leisure because a little went a long way (especially the pb & j). This bread pudding is different. It is light. It is not too sweet. It is something three people can finish in one sitting. Sorry other people I meant to share it with.

    
     For a spur of the moment - I completely made up the recipe dessert, this chocolate bread pudding turned out delicious. Like I said, it was light and not cloyingly sweet. Instead, warm out of the oven, it was chocolatey, a little chewy but soft, and delicious. The crusty bits on top were extra good crunchy chocolatey morsels. We had two helpings each easily and didn't regret it at all. I love when midnight experiments turn into delicious midnight snacks.

Chocolate Bread Pudding

4 pieces Slightly Stale Crusty White Bread (I used Tuscan Pane from Trader Joes)
2 Eggs, Beaten
1/3 cup Yogurt
1/2 cup Milk
1/2 cup Sugar
1/2 tsp Vanilla
1 tbsp Cocoa

Butter a loaf pan. Crumble the pieces of bread into 1'' by 1'' pieces onto a plate. In a medium bowl (or large tupperware), mix together the eggs, yogurt, milk, sugar, vanilla, and cocoa thoroughly. Add the bread to the mixture, and stir everything together until all the pieces of bread are coated in liquid. Cover the container, and allow the bread to soak in the liquid for at least half an hour. When you are ready to bake, heat the oven to 425 degrees. Dump the soaked bread and any remaining liquid into the loaf pan, making sure they are evenly spread through the pan. Bake for 50-55 minutes, until the top looks set and firm. Allow to cool on a wire rack for five minutes, then serve straight out of the pan.

Friday, March 25, 2011

When Slowly Starving


     Some days are long. So long because you have work in the morning, class in the afternoon, work at night, and then you get home and you just want to EAT something but you don't know what. So what do you do? Well, I putter aimlessly around the kitchen for five minutes. There is pork in the fridge but what to do with it? Baking it is obviously not an option, not if my stomach is making certain grumbling noises.


     But, this Thursday I got lucky. My aimless puttering landed me in front of our giant bag of rice and I realized I knew exactly what to make which would be quick, simple, satisfying, and delicious. Fried Rice. Who doesn't like fried rice with pork? Except Vegetarians, who don't count (hush I'm making a point here).


     So, I marinated my pork for ten minutes while I cooked rice in the microwave. In case you ever don't have time to use the rice cooker (since mine generally takes 20 minutes) and want to make rice for just yourself: Put 1/2 cup of rice in a microwave safe bowl, add 1 cup of water, cover the bowl with a microwave safe lid and microwave for about 8 minutes. 8 minutes makes the rice perfect with my microwave, but it took much trial and error to find that out. You may have to fiddle with a few different times. Double the amount of rice and water for two people and so forth. 


     Anyhow, my fried rice ended up containing pork, egg, and kale. There is kale now defrosting in my fridge, as you may recall, and it needs to be used up. I love fried rice. To me, it is comforting in a french fries and burger kind of way. It has an unhealthy-tummy filling-utterly delicious vibe, but when you make it at home, it's not actually that unhealthy. What else could one ask for? I was so happy with it, I gulped it down in five minutes flat. My soy sauce-hoisin sauce-honey marinade made my pork taste great and just like restaurant pork. The kale made me feel a little healthier, and gave everything a fresh taste. And the rice was delicious. I love that this fried rice actually reminded me of take-out fried rice. Maybe I should package some in those little white boxes, except I wolfed it all down too fast. Next time. 

Pork Fried Rice

For Pork:

1 Thin Boneless Pork Chop 
1 tbsp Soy Sauce
1 tsp Hoisin Sauce
1/2 tbsp Honey 
2 tbsp Vegetable Oil 

For Fried Rice: 

1 Thin Boneless Pork Chop worth of Cooked Pork 
1 Egg, Beaten 
1/4 cup Pre-Boiled Kale 
1 1/2 tbsp Vegetable Oil 
1/2 cup Rice, Cooked and Cooled (Note: See Post Above) 
1 tbsp Soy Sauce 

To Cook the Pork
Trim the pork chop of excess fat. Then, cut it into bite size (1/2'' by 1/2'' pieces). In a small bowl, mix the soy sauce, hoisin sauce, and honey together. Drop in the pieces of pork and turn them to allow each piece to be thoroughly coated with marinade. Allow the pieces to marinate in the bowl for 15 minutes while cooking rice, etc. Then, heat the vegetable oil in a frying pan at medium heat. Cook the pork for 2 mins on each side until each piece is cooked through. Transfer it back into the bowl with the remaining marinade. (I used the oil left in the pan to scramble the egg in.) 

To Cook the Fried Rice: 

After cooking the pork, pour the beaten egg into the frying pan and scramble it. Set the pan aside. In a wok or large saucepan (what I had), heat up the vegetable oil at medium heat. Add the rice and and soy sauce, and mix them together thoroughly. Add the pork, the remaining pork-marinade, eggs, and kale, stirring till everything is well combined. Allow everything to cook together for a few minutes, and you are ready to serve! 

Thursday, March 24, 2011

Healthiness


     I love having groceries. I love being able to open my fridge and pull out food. The simple pleasures of life are always the best, right? What I love most of all, though, is being able to cook my own meals again. (As though I was being Forced to not cook the past two weeks - I know it is my own fault I didn't grocery shop before...don't look at me like that.) Point being, I felt so unhealthy the past two weeks eating out all the time - I have had more Chipotle in these few days than I have had in my entire life combined before now. So, now that I have food, what am I making to make myself feel better?


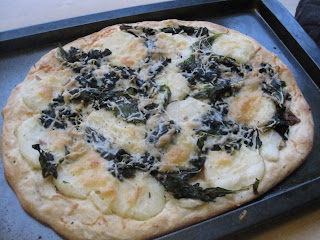
     Pizza, apparently. Pizza doesn't even sound like a healthy food, but my pizza was as healthy as pizza can get (probably). Potatoes, kale, a little bit of cheese - I didn't even put a sauce! What else can you ask for? It is sitting in my bag staring at me, and I really want to have some even though these two pieces have to last me till 4:30 (when I finish class). Excuse me while I eat.


     Yum. Anyway, I still had a Trader Joe's Pizza Dough sitting in my freezer so I defrosted it along with the kale I boiled and froze a long time ago. Must make way for all the new groceries that are going into my freezer. I bought the potatoes yesterday, and I couldn't wait to use them - so of course they had to go on the pizza as well. Also, I like kale, and it's healthy and all, but I can't imagine eating a Just Kale pizza. That just sounds awful to me...


     Making pizza is so relaxing and easy. Especially when the most time consuming part of the process is waiting for the potatoes simmering away in a pot of water to become tender. It sure takes a lot of hands on work. (Sarcasm, just in case its not clear. Sarcasm and writing on the internet don't seem to always go together.) So, what does my pizza taste like? Crust thats crisp on the outside but has a little give on the inside, hurrah for Trader Joe's, soft potatoes, salty garlicky lemony Kale, and the nice crunch of cheese. What else can one ask for?


Kale and Potato Pizza


1 16 oz ball of Trader Joe's Pizza Dough
OR Enough Pizza Dough for a 12'' diameter thin-crust pizza 
3 mid-sized Red Potatoes 
1 tsp Salt 
1 tsp Pepper
2 tbsp Olive Oil 
1 Garlic Clove, Minced
1/3 cup Pre-boiled Kale (or you could use fresh kale) drained of water
1 Lime (or Lemon)
1/3 cup Shredded Monterey Jack Cheese (or whatever kind of cheese you have) 

If your pizza dough is in the fridge, make sure to take it out 20 minutes before you plan to use it.

Pre-heat your oven to 425 degrees. Place the three potatoes in a medium saucepan and cover with water, adding a dash of salt. At medium heat, cover the saucepan and let the potatoes simmer for 10-15 minutes until you can easily stick a fork through them (it will take different times depending on the size of your potatoes). Meanwhile, cut the ribs off your kale if you have not already, and shred it into about 2'' by 2'' pieces.

Once your potatoes are done, pull them out of the hot water. While they are cooling, heat the olive oil up in a frying pan at medium heat. Add the garlic, and once it is lightly browned, add the kale. Stir everything together, cooking till the kale is limp, and then squeeze and mix in the lime (or lemon) juice. Turn off the heat, making sure the kale is thoroughly coated with lemon juice and olive oil. Then, slice the potatoes into about 1/4 '' slices. Sprinkle a little salt and pepper on both sides of the potatoes, mixing them to make sure each piece is seasoned. Put the potatoes in the saucepan with the kale and toss everything a few times.

Take a large baking sheet and smear it with olive oil. Roll out the pizza dough or press it down until it fills most of that baking sheet. Top it with the kale, potatoes, and then the cheese. Bake it at 425 degrees for about 10 - 15 minutes, until the crust is golden brown. Take the baking sheet out and allow the pizza to cool on the baking sheet for a few minutes, then transfer it to a cutting board. Cut and eat!

Wednesday, March 23, 2011

I Have Been Bad

     I know I have been bad. I have not posted for how many days? Since Saturday. What kind of blogger am I! But don't worry, I haven't been secretly eating well and not telling you about it. Here is a full list of my meals from yesterday: omelette, peanut butter and jelly, pepperoni pizza hot pocket, and a grilled cheese. Yup, not hiding anything from you.

Guess what I made?
     But, now I am BACK! Why did I take so long? Well, I had an exam on Friday and then one on Monday, so I did not go grocery shopping over the weekend. I was going to wait till this weekend because of the whole class till 5, work till 9 thing. But, I just could not live without food any longer - I mean look at what I ate yesterday! So I did the only thing a sensible person would do. I skipped class today to go grocery shopping. Yay! And this means means, we are back to blogging!

Artistic Lime
     Now, it's ironic that what I am actually posting today has nothing to do with my groceries. It has to do with the fact that I got out of lab an Hour and a Half early. How amazing is that? So I came home and another amazing miracle happened: my roommate was home! For those who do not know, the reason my roommate AT is rarely mentioned on this blog is because she works at the newspaper from 5 pm to 2 am - or later - every single day. It is craziness. But it also means she is never around to cook / eat with me! Except today.


     She also happens to the be the proud owner of three avocados (formerly four before she ate one) brought from California by BJG. As they are getting increasingly mushy due to her ridiculous work schedule, we took this chance to make guacamole with them!


     This is what making guacamole entails: Spooning the avocado out from the avocados (there must be a better way to say that) while trying not to eat any, adding some lime juice and some salt and some pepper, realizing there is too little lime juice so adding more, and then realizing there is too much lime so we need to use another avocado (originally we were only using two), adding more salt and pepper...and eating all the while. It also involves making lime people if you are my roommate:


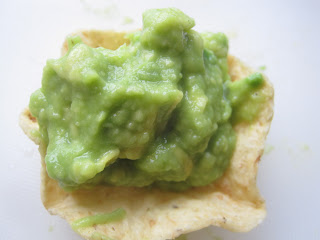
     So, then we had guacamole. I mean what can I possibly say about it? It tastes like summer and delicious mexican food and liminess and tanginess and softness, and it is a very good thing we had chips to eat it with or we would have just eaten it all up with our very large spoons. Enjoy fresh homemade guacamole once in a while, it is no effort at all and it will be so worth it! Also, I will be posting again very very very soon! Thanks for not giving up on me (again).


Guacamole 


3 Very Ripe mid-sized Avocados 
1 Lime 
1 tsp Salt 
1/2 tsp Pepper 

Cut your avocados in half, take out the seed, and use a spoon to scoop the avocado meat (?) into a medium bowl. Use a knife to cut it into smaller pieces (if you would like), or just use a fork (or spoon) to mush the avocados until they are as smooth or chunky as you would like them. Roll the lime on a flat surface (to get its juices moving), cut it in half, and squeeze juice into the avocados. Then, sprinkle in the salt and pepper. I was sprinkling, so the measurements are approximate: you should season to your taste. Mix everything all together, and enjoy!